There is lot of meticulousness when doing high bay lighting installation as for very obvious reasons all considerations in terms of planning, wiring and spacing must make up to regulatory standards. One can currently expect to have warehouse lighting retrofits completed on a fixture basis between 15 and 30 minutes.
What if there is one, and only one, slight failure on your behalf, in the installation manual report, regarding something that is expected of you or that the electrical supervisor recommends as necessary? Year in, year out, some buildings fail to pass the final inspection because of lack of shallow and proper ground installation, or excessive loading of mounting components, or even unshielded dimming circuits. The units would be working, but the lines in installing them will not be accorded. It translates to redundant work with delays and a lot of turpins.
A majority of facility managers are aware that UFO high bay lights contribute to the reduction of energy consumption. However, only a few are aware of the fact that an installation process affects whether or not there will be necessity for ceiling inspection and whether the light levels paid for are achieved. This particular installation manual on LED high bay lighting installation encompasses all the aspects right from OSHA standards and NEC regulations to methods of mounting, connecting cables, and conducting space checking after installation. You will receive a detailed step-by-step instruction, a spacing decision table, and an active facility manual for such installations that don’t need the shutdown of operations.
Key Takeaways
- Compliance over Coating: A warehouse necessitates a minimum of 5 foot-candles by OSHA; Article 410 dictates all luminaire wiring and support.
- Select a bracket rated for 3–4× the apparent fixture weight: in a hurry? Hook mounting is the quickest option, whereas pendant mount gives you the most precision for the exact drop heights.
- Fixtures must be at a distance of 1–1.5× their mounting height; opt for a 90° beam spread for standard warehouses or a 60° for warehouses with ceilings above 30 feet.
- Keep the Line Voltage and Dimming Wires [Purple/Grey] Apart. Dimming Leads Not Needed Should Be Capped to Prevent Interference.
- Measure foot-candles, 20–30 fc for a warehouse, 50–75 fc for assembly and inspection areas, after the fixtures are installed.
Pre-Installation Planning for High Bay Lighting Installation

Before you start doing a high bay lighting installation, it’s necessary to meet operational objectives and comply with safety statutes, both to ensure that the lights are safe and not in contravention of any existing conditions.
OSHA Minimum Lighting Requirements
Minimum foot-candle levels are set by the Occupational Safety and Health Administration for industrial spaces with 29 CFR 1926.56. This is not just a suggestion; it is required for you to meet the standards during construction and installation of a high bay lighting system.
- Warehouse storage areas require a minimum of 5 foot-candles.
- General shop and machine areas require a minimum of 50 foot-candles.
- Active work and assembly areas require a minimum of 30 foot-candles.
- Office areas within industrial facilities require a minimum of 30 foot-candles of vertical illuminance.
These readings constitute an absolute floor, above which the application considers newer facilities, in essence, aiming higher in the quest for better productivity, safety, and accuracy through better lighting. Any lighting system undershooting these provisions runs the risks of OSHA violations as well as worker-comp claims related to decreased visibility.
NEC Electrical Code Considerations
Luminaire installation, support, and grounding are all covered by the NEC (NEC Article 410). Key requirements for installations of high bay lighting include:
- Supporting: Luminaires must be supported to the element junction box independently or with a junction box rated for the load.
- Conduit and grounding: All metal junction boxes and conduit should be grounded properly and must be bonded.
- Breaker sizing: Circuit breakers must be rated according to the total fixture load–plus 25% margin for continuous operation.
- Working clearances: NEC 110.26 offers requirements for working clearances around the electrical panels and junction boxes.
If you are adding new circuits or modifying panel loads on site, there is high probability of needing a permit and inspection. Always check with your AHJ before beginning.
When You Need a Licensed Electrician
Electrical installations of the high-bay lights do not usually need an electrician, but all the same, numerous cases that do require consideration. Hire a licensed electrical contractor wherever:
- 277v or 480v circuits are been operated upon (frequent in commercial and industrial installations).
- New circuits are being run or existing panel loads are being altered.
- The community code requires a luminaire permit; the threshold for those may vary in any given code.
- The insurance of your facility or the corporate safety program mandates only licensed electrical work.
- You lack the tools or training to verify proper grounding, bonding, and load calculations.
When Meridian Distribution team refurbished their 40,000-square-foot facility in Texas, their maintenance lead tried to wire it himself to save themselves the $3,200 contractor fees. Everything was good for a while, until the bonding requirement for the metal junction boxes was missed; this provoked the inspector to flag it while the utility showed no intention to energize, causing them to lose four days of scheduled operation. The”savings” cost them $3,200 in contractor fees. Bonding requirement on metal junction boxes were missed. The inspector flagged it, the utility delayed energization, and the facility lost four days of planned operation. The”savings” cost them $18,000 in downtime.
Want to make sure you choose the right fixtures before installation day? Read our guide on how to choose UFO high bay lights to lock in your wattage, beam angle, and color temperature first.
Tools and Safety Gear for High Bay Lighting Installation
The right tools prevent injuries, speed up the job, and ensure connections that last. Do not start a high bay lighting installation without verifying that every item on this list is on-site and rated for your specific fixtures.
Essential Tools Checklist for High Bay Lighting Installation
- Voltage tester (non-contact and contact-type): Confirm power is off before touching any conductor.
- Wire strippers and cutters: For clean, precise connections.
- Wire nuts or Wago connectors: Rated for the wire gauge and number of conductors.
- Electric drill with bits: For installing hooks, beam clamps, or junction boxes.
- Ladder or scissor lift: High bay fixtures require elevated access; ladders are rarely sufficient above 20 feet.
- Light meter: For post-installation verification of foot-candle levels.
Mounting Hardware Load Ratings
Most installation manuals get dangerously vague at this point. Fixtures for dynamic loads, seismic movement, and accidental impact typically mandate that the mounting components handle around 3–4 times the dead weight of the fixture.
- Eye bolts or lag hooks with at least 50 lb workloads must be used for standard UFO fixtures (5–15 lb each) when hook mounting.
- Chain mount must use Grade 30 or more chains with working load limits clearly marked.
- Beam clamps must fit your beam flange width of the total suspended load they are rated for.
- Junction boxes must be fan-rated or listed for luminaire support if they carry the fixture load.
As a consequence of large weight savings, LED UFO high bays are much lighter than the old metal halide light fixtures. This works in favor of lighter fixtures, but that does not legitimize using undersized hardware. A 15-pound fixture on a 20-pound-rated hook sways a lot and is just calling for an accident.
PPE and Lift Safety
- Hard hat and safety glasses: Required in all active industrial facilities.
- Fall protection harness: Mandatory when working above 6 feet in many jurisdictions; strongly recommended regardless.
- GFCI protection: All temporary power tools and lift chargers must run through GFCI-protected outlets.
- Lockout/tagout (LOTO): Follow your facility’s LOTO procedure before de-energizing circuits.
High Bay Lighting Installation Mounting Methods

Choosing the right mounting method for your high bay lighting installation depends on your ceiling type, height, and whether you need to drop fixtures below obstructions like ductwork or conveyor systems.
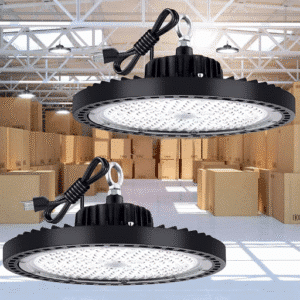
Hook Mount (Most Common)
The mounting method mentioned above is much faster than the rest. The UFO high bay light may have a round hook or an eyebolt with it already attached which is not a problem as long as you attach a hook or eye lag to the beam and bear the weight of the lighting on a mechanical jib or pulley and then hang it.
- Common uses: Warehouses, gymnasiums, factories with open steel beams.
- Advantages: The fastest speed of installation. Once the beam height is right, no need to adjust anything.
- Disadvantages: Fixed height—you cannot lower it by more than what the catch below does.
Our standard option of 150W UFO high bay light is perfect for open warehouses and gyms, and manufacturing facilities with an exposed beam of 20′-25′ and does best with hook-up mounting.
Chain Mount (Adjustable Height)
Chain mounting is flexible and relies on the chain to suspend the fixture at a particular drop distance. This scenario is common for uneven beam levels where the objective is to level numerous fixtures to a sloping roof line.
- Best for: Sloped ceilings, uneven beam heights, or facilities where precise leveling matters.
- Advantages: Adjustable, forgiving of irregularity in ceiling heights.
- Limitations: Chain mounting takes a little longer to install; it can be wobbly unless tensioned.
Pendant / Pipe Mount (Industrial Standard)
The pendant mounts offer the industrial standard in drop length. These are the most professional means of installation, and they offer optimal stability.
- Best for: Facilities with precise height requirements or fixtures that must clear obstructions.
- Advantages: Rigid, stable, controlled drop height.
- Limitations: Threading and cutting of pipe; slower compared to hook or chain.
For attaching this high bay lighting installation, a 1/2″ NPT rigid conduit or threaded pipe can be used. The fitting body must be thread-coupled; then, the conduit or pipe can be screwed onto the desired length.
Surface / Flush Mount (Low Ceilings)
Fixtures are attached directly to the ceiling. This method of surface mount is suitable for ceilings with a height below 20 feet from the floor, where there is no need for pendant drops.
- Best for: Workshops, retail spaces, and low-ceiling industrial areas.
- Advantages: Neat and tidy look with no swinging components.
- Disadvantages: Needs a flat plane on the ceiling and a properly rated junction box.
Cable Suspension (Linear Fixtures)
Aircraft cable is used with adjustable grippers. This is usually used with linear high bays, giving a spotless and sleek look.
- Best for: Linear high bays within retail, offices, or even contemporary industrial settings.
- Advantages: Sleek view, is height adjustable.
- Disadvantages: Cable hardware and aligning orientation will be necessary.
Wiring High Bay LED Fixtures: Installation Best Practices
High bay light wiring is the phase where most high bay lighting installation projects fail inspection. Follow color codes, separate voltage classes, and verify every connection before energizing.
Standard 120–277V Connections
High bay light wiring for most commercial LED high bays operates on 100–277V AC. The wiring is straightforward if you respect the color code:
- Black: Hot (line voltage)
- White: Neutral
- Green or bare copper: Ground (earth)
Connect black to black, white to white, and green to the grounding screw or bare ground conductor in the junction box. Use wire nuts or Wago connectors rated for your wire gauge. Tug-test every connection before closing the fixture housing.
0-10V Dimming Wire Setup
If your high bay lighting installation includes fixtures that support 0-10V dimming, you will find two additional low-voltage wires:
- Purple: Positive dimming signal (+)
- Gray or pink: Negative dimming signal (−)
These wires carry only a control signal — not line voltage. They must be run separately from power conductors to prevent electrical interference. If you are not using dimming initially, cap both dimming leads with wire nuts. Do not leave them exposed or twisted together.
High-Voltage Systems (277–480V)
In industry situations, 277V or 480V circuits are frequently used for lighting systems. Massive training combining experience in high bay lighting installation expertise is needed for these voltage levels. If a facility has high-voltage distribution, all work must be performed with a licensed electrician. Avoid working on 277V or 480V circuits unless trained and geared with the PPE.
Grounding and Bonding Requirements
All luminaires mounted on junction boxes or conduits made of metal should be grounded and bonded in accordance with the NEC. As a result, the grounding rules are:
- The green ground wire of the fixture should be tied to the ground screw or the ground conductor in the junction box.
- Metal conduit should be continuously and electrically connected to the panel ground.
- Non-metallic cable (Romex) must have the ground wire properly checked and terminated at both ends.
Grounding is not optional in any high bay lighting installation. It protects against shock hazards and ensures that overcurrent devices operate correctly during a fault.
Want a comprehensive understanding of UFO high bay light? Check out our (UFO high bay light guide).
Spacing and Layout for High Bay Lighting Installation

Even a perfectly wired fixture in a high bay lighting installation delivers poor results if it is in the wrong place. Spacing determines uniformity, coverage, and whether you meet your foot-candle targets.
Spacing by Ceiling Height
The standard rule is to space fixtures at 1 to 1.5 times the mounting height. Use the lower end (1×) for narrow beam angles or high illuminance requirements. Use the higher end (1.5×) for wide beam angles and general warehouse lighting.
| Ceiling Height | Fixture Spacing | Beam Angle | Application |
|---|---|---|---|
| 15–19 ft | 10–14 ft | 120° | Workshops, retail, garages |
| 20–25 ft | 14–18 ft | 90° | Standard warehouses, gyms |
| 25–30 ft | 18–22 ft | 90° | Large warehouses, manufacturing |
| 30+ ft | 20–25 ft | 60° | Bulk storage, hangars, atriums |
Table: High Bay Lighting Installation Spacing by Ceiling Height
Looking to design your warehouse lighting layout? Check out our (warehouse lighting layout guide).
Spacing by Beam Angle
High bay lighting spacing depends on beam angle, which controls how light spreads from the fixture to the floor. The wrong angle creates hot spots directly below and dark zones between rows.
- 60°: Concentrated throw for high ceilings. Use at 30+ feet where light must travel a long distance.
- 90°: The standard for warehouse lighting. Balanced spread and intensity at 20–30 feet.
- 120°: Wide spread for lower ceilings under 20 feet. Avoid above 25 feet where floor intensity drops too low.
Distance from Walls and Obstructions
A minimum of 2 feet should separate light fixtures from walls to avoid wall washing and wasted light. However, if your facility has very high shelving or racking, you should consider adding extra spacing, or use asymmetric optics to allow light to penetrate further directly down the aisle.
Aisle vs Open Floor Layouts
- Open floor plans: UFO fixtures spaced in a grid pattern work best. Use 90° beams for standard coverage.
- Aisle layouts: Consider linear high bays for continuous aisle coverage, or space UFO fixtures closer together (1× mounting height) to prevent dark shelving faces.
The workers from Apex Logistics thought it would be a walk in the park when spreading the fixtures 25 feet apart with 90° beams on 20-foot ceilings doing a high bay lighting system. But ounds strange, such rule of thumb failed: the light readings showed on their meters an average of 12 foot-candles at the corner spots, far below their target of 20 foot-candles. Spacing was instead narrowed to 16 feet, two fixtures to a row were added, and they now got an average of 28 foot-candles with much improved uniformity.
Step-by-Step High Bay Lighting Installation Walkthrough
After turning off the circuitry, high bay lighting installation consists of: configuration of fixture settings, installation, hot-neutral-grounding, restoration of power, and a light meter reading of foot-candles verification.
These six steps are not to be skipped. This means the difference between a clean install and an expensive call back.
Step 1: Power Down and Verify
Every high bay lighting install first: safety. Turn off the circuit breaker supplying the existing fixtures or the new circuit. Then measure for voltage standing at the junction box of an electric locater tester. In a lockdown/tagout safety routine, apply the lock and tag the facility might provide per the requirement.
Step 2 — Pre-Configure Settings
Before lifting the fixture, set any adjustable options on the ground:
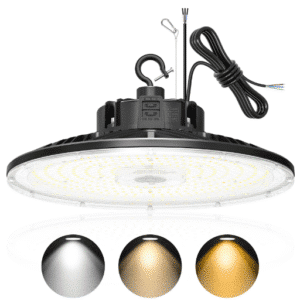
- Color temperature switch: Select 4000K or 5000K based on your application.
- Wattage adjustment: If your fixture supports switchable wattage (100W/120W/150W), set it now.
- Dimming jumpers: Configure any internal dimming settings if applicable.
It is much easier to flip a switch on the ground than on a lift 25 feet in the air.
Step 3 — Mount and Hang
Mount the hardware at the marked places. For hooks, drill pilot holes and drive rated eye lags into structural steel or wood beams. For pendants, cut pipe to length and thread both ends. A scissor lift or a pulley system will lift the fixture. Ensure that the fixture grips and hangs level.
For facilities that need a fixture built for quick hook-mount deployment and on-site wattage adjustment, the D11 UFO high bay light shoots with pre-installed hanging hardware and a color temperature switch for no ladder-time adjustments. For higher ceilings or 600W+ HID replacements, the 200W UFO high bay shines out lumens and throws light the needed distance for high-ceiling applications.
Step 4 — Wiring and Secure Section
Strip wire ends with appropriate length for connecting hot, neutral, and ground wires together using wire nuts or Wago connectors. Cap dimming wires if present, if not attached to the dimming connection. Pull all the terminated connections to check them. Finally, replace the fixture cover ensuring all the screws are tightened and check for exposed or pinched wires.
Step 5 — Power On and Test
Unlock/tag the circuit, then switch on the breaker. Now, test each fixture and its dimmer option. Check or run a complete test from 0% to 100% for dimming controls you may have installed. Look out for any buzzing or humming, implying a loose connection or an imperfect pairing of dimmer and light.
Step 6 — Light Meter Verification
Use a light meter and measure foot-candle readings of the light emanating onto the work plane. Check various spots in the room, such as corners and the midpoint between fixtures. Are your findings in comparison with the numbers listed in the following table.
| Task Type | Target Foot-Candles |
|---|---|
| Warehouse storage | 20–30 fc |
| General assembly | 30–50 fc |
| Detailed inspection | 50–75 fc |
| Shipping and receiving | 20–30 fc |
| Office areas | 30–50 fc |
If readings are low, adjust fixture spacing, beam angle, or wattage before declaring your high bay lighting installation complete.
Post-Installation Testing and Troubleshooting for High Bay Lighting
A working fixture is not the same as a correct high bay lighting installation. Run through this verification checklist to catch problems before the inspector or your operations team does.
Light Meter Verification
Take light readings across the floor at the grid points after installing light high bay luminaries. The average should add up to your target, while the lower intensity should not drop below 70% of the average intensity (3:1 uniformity ratio). If the light is too wide or too deep at these points, change the position or alter the beam angle.
Checking for Flicker and Hot Spots
Flicker is invisible to the naked eye in many cases but causes fatigue and headaches. After high bay lighting installation, use your smartphone camera in slow-motion mode to detect flicker — if you see banding or pulsing, check your dimmer compatibility and driver quality. Hot spots directly below fixtures indicate overly narrow spacing or the wrong beam angle.
Common Installation Mistakes
- Improper Spacing: Far-off fixtures create dark zones, and too close of a spacing means, which leads to energy waste and glare.
- Thick Beams: Thanks to the spreading of light rays so far off from the work plane, the 120° beams would would reduce the effect of light.
- Inclusion of insulated dimming wires: If dimming wires are not installed with high-grade insulation, any interference may induce erratic dimming.
- Overloaded Hooks: Hardware poorly manufactured that is below the safety rating might result in the fixture getting disconnected from the hook.
- Missing Grounds: Without grounding, the fixture is now a shock hazard and is in line for inspection failure.
Installation in Active Facilities: Minimizing Downtime

Most high bay lighting installation guides assume an empty warehouse. In reality, you are probably retrofitting a facility that needs to keep operating. Here is how to complete your installation without shutting down.
Phased Installation by Zone
Divide the facility into zones and install one zone at a time. This limits disruption during warehouse lighting installation and gives you a chance to verify results before committing the full space. Start with a pilot zone of 10–20 fixtures to validate your spacing and mounting approach.
Weekend and Night-Shift Scheduling
Schedule the bulk of your high bay lighting installation work during off-hours. If your facility runs two shifts, use the third shift or weekend window. Have temporary lighting ready so staff can continue working safely in zones where old fixtures have been removed. Have temporary lighting ready so staff can continue working safely in zones where old fixtures have been removed.
Temporary Lighting During Retrofit
Portable LED work lights on stands can maintain safe illumination in active zones during high bay lighting installation while fixtures are being swapped. Position them to avoid shadows in travel paths and work areas.
One-for-One Replacement Strategy
If you are retrofitting existing metal halide fixtures, remove and replace one fixture at a time. This maintains coverage and lets you compare LED output directly against the old system. When Marcus Chen retrofitted his Ohio distribution center, his crew used a one-for-one approach across three weekend shifts. The warehouse never dropped below safe light levels, and the crew caught a wiring polarity issue on the first fixture instead of discovering it after 100 were hung.
Ready to calculate your project payback? Use our LED high bay ROI calculator to see exact savings for your retrofit. Once your fixtures are in place, consider upgrading to smart warehouse lighting controls that automate dimming by zone, shift, or occupancy — cutting energy use without adding installation complexity.
Frequently Asked Questions
How far apart should high bay lights be spaced during installation?
Space fixtures at 1 to 1.5 times the mounting height. And for a 25 lateral height, start at a ceiling spacing of 20 to 25 feet using a 90-degree beam angle. The light measurement shall finally be with a light meter after fitting; adjust the sequence again based on the actual readings of the foot-candle units.
Can I install high bay lights myself?
In some cases, the high bay LED light installation can be handled by the maintenance staff if the old fixtures are being replaced on the same circuit with upgraded voltage. Still, the installation will require a qualified high bay lighting installation electric contractor for the new circuit, a 277V/480V system, and, if required, inspections or permits.
Do I still need a permit for high bay lighting installation?
Permit requirements for high bay lighting installation differ not only between states, but even different municipalities. As a general rule, a one-for-one replacement would not require a permit in most areas; however, full installation with new circuits, panel modifications, or implementation into new construction would reciprocally always mandate obtaining a permit. Before work begins, contact the Planning for a successful endeavor!
How long does it take to install a fixture?
The Elapsed time for hook mount installations in the case of open ceilings probably averages 15–30 minutes per fixture for experienced crews. Pendant mounts and workings with conduit take a bit longer:-30 minutes per socket. The time taken will have to be higher if, in the midst of the high bay lighting installation, there are activities on site or there are other types of obstacles.
What Is The Wire Gauge Required For High Bay Lighting?
Most LED high bays within a high bay lighting system are supposed to pull about 0.5–2.0 Amps per fixture at 120V or proportionally less at 277V. In the case of the 14 AWG circuit, the usual allowance is up to 15 Amps. This will allow the A2 and AWG conductors to draw 20 Amps with all the assumptions combined. Add 25% of the total load for having continuous operation and then set the wire and breaker size accordingly.
Can high bays be installed in an operational warehouse?
Yes. To this end, an approach towards ensuring realization of progressive installation would require a measure to be put in place for the replacement of obsolete high bays with new ones at a one-on-one ratio.
Conclusion
High bay lighting installation is neither difficult nor easy. It is unforgiving. Miss even one grounding requirement and you fail inspection. Use the wrong beam angle and you waste lumens. Space fixtures incorrectly and you pay double—once for labor and then again to take them back down: Adjust mounting or beam angle and re-install.
Have material rated for your load, install for protection according to the code, keep the heights and the beam angles all proportionate considering the cubic area of your workspace, and then, after you have laid and tied these tenets all down, run a light spread test. Do that, and your setup will pass its inspection, give your plant or shop the light it wants.