Size a solar high bay lighting system in four steps: calculate your lighting load (watts x hours), size the solar array (daily load divided by peak sun hours), size the battery bank (autonomy days x daily load divided by depth of discharge), and select the charge controller (panel output current x 1.25). The same 20,000 sq ft warehouse needs a 12 kW solar array in Phoenix but a 22 kW array in Seattle. Getting the math right determines whether your system runs reliably for 15 years or fails in six months.
Most sizing guides give you formulas. They don’t show you how to apply those formulas to a real warehouse with real dimensions, real sun hours, and real runtime requirements. That’s where projects go wrong. Undersize the battery bank and your lights die during a cloudy week. Oversize the solar array and you spend $15,000 more than necessary.
This guide walks through the complete sizing process with a worked example for a 20,000 sq ft warehouse. You’ll see how the same building sizes differently across five US regions, and you’ll learn the mistakes that cost facilities managers thousands of dollars. If you’re new to solar-powered industrial lighting, start with our solar high bay lights complete guide for a system overview.
Key Takeaways
- Calculate lighting load first: fixtures x wattage x daily hours = daily Wh consumption. A 36-fixture system at 150W running 12 hours uses 64,800 Wh/day.
- Solar array size depends on location: the same warehouse needs 12 kW in Phoenix (6.5 peak sun hours) but 22 kW in Seattle (3.5 peak sun hours).
- Battery bank sizing uses autonomy days (3-5 for standard off-grid) multiplied by daily load and divided by depth of discharge (80% for LiFePO4).
- Always use worst-month peak sun hours, not annual averages, to avoid winter failures.
- MPPT charge controllers are 20-30% more efficient than PWM and are required for any system over 200W.
Step 1: Calculate Your Lighting Load

Before you size panels or batteries, you need to know how much energy your lighting system consumes every day. This starts with lumen requirements and ends with watt-hours.
Determine Lumen Requirements
The Illuminating Engineering Society (IES) publishes recommended illuminance levels by application. These are the industry standard for lighting design, available in the IES Lighting Handbook.
| Application | Foot-Candles (fc) | Lux (approx.) |
|---|---|---|
| General warehouse | 20-30 fc | 200-300 lux |
| Active warehouse / shipping | 30-50 fc | 300-500 lux |
| Manufacturing (general) | 50-75 fc | 500-750 lux |
| Inspection / quality control | 100-200 fc | 1,000-2,000 lux |
To convert to total lumens needed, use this formula:
Total lumens = square footage x required foot-candles / light loss factor
The light loss factor accounts for dust accumulation, driver degradation, and optical losses over time. Use 0.75 for clean environments and 0.65 for dusty industrial spaces. A 20,000 sq ft warehouse at 30 fc with a 0.75 light loss factor needs 800,000 lumens.
Select Fixtures and Count
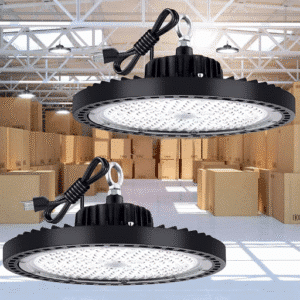
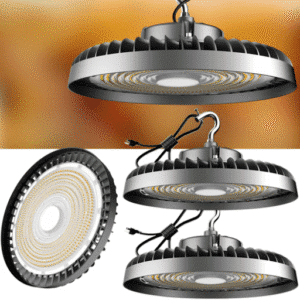
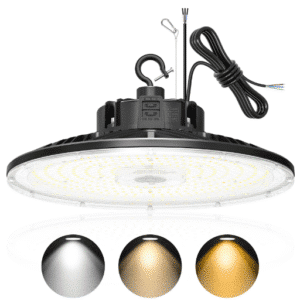
Standard UFO high bay LEDs produce 20,000-30,000 lumens per fixture. A 150W fixture delivers approximately 22,500 lumens at 150 lm/W efficiency. A 200W fixture delivers approximately 30,000 lumens.
Number of fixtures = total lumens needed / lumens per fixture
For our example: 800,000 / 22,500 = 35.6, rounded up to 36 fixtures.
Verify spacing against mounting height. The spacing-to-height ratio should be 0.8-1.2 for uniform coverage. At a 30 ft ceiling with 90-degree beam angles, fixtures should be spaced 24-36 ft apart.
Calculate Daily Energy Consumption
Daily load (Wh) = number of fixtures x wattage per fixture x daily runtime hours
For our example: 36 fixtures x 150W x 12 hours = 64,800 Wh per day (64.8 kWh/day).
This number drives every subsequent sizing calculation. Write it down. If this number is wrong, everything downstream will be wrong.
Need help determining lumen requirements? Our how many lumens for high bay lighting guide breaks down requirements by ceiling height and application.
Step 2: Size the Solar Array
The solar array must generate enough energy each day to power your lighting load. The critical variable is peak sun hours, which varies dramatically by location.
Find Your Peak Sun Hours
Peak sun hours represent the equivalent number of hours per day when solar irradiance reaches 1,000 W/m2. This is not the same as daylight hours. A location might have 14 hours of daylight in summer but only 4.5 peak sun hours because of angle, clouds, and atmosphere.
| US Region | Peak Sun Hours (worst month) | Peak Sun Hours (annual avg) |
|---|---|---|
| Phoenix, AZ | 5.8 | 6.5 |
| Miami, FL | 4.5 | 5.2 |
| Chicago, IL | 2.8 | 4.0 |
| Boston, MA | 3.0 | 4.0 |
| Seattle, WA | 1.8 | 3.5 |
Always use worst-month values for sizing. Using annual averages leads to systems that fail in December and January. NREL provides location-specific solar resource data at NREL Solar Maps.
Calculate Required Panel Wattage

Panel wattage = daily load (Wh) / peak sun hours / system efficiency
System efficiency accounts for wiring losses (3%), controller losses (5%), dust and degradation (10%), and temperature derating (5-10%). Use 0.75-0.85 for system efficiency. We’ll use 0.80. For a deeper look at these losses, see EE World’s solar lighting control system design.
For Phoenix (5.8 worst-month peak sun hours):
64,800 Wh / 5.8 / 0.80 = 13,965W (approximately 14 kW)
For Seattle (1.8 worst-month peak sun hours):
64,800 Wh / 1.8 / 0.80 = 45,000W (45 kW)
That’s a 3.2x difference. The same warehouse needs more than three times the solar capacity in Seattle compared to Phoenix. This is why location-specific sizing matters.
Apply Oversizing Factor
Multiply by 1.25 minimum to account for cloudy days and future load growth. For critical facilities, use 1.5x.
Phoenix with 1.25x: 14 kW x 1.25 = 17.5 kW
Seattle with 1.25x: 45 kW x 1.25 = 56.25 kW
Panel Configuration
Standard monocrystalline panels produce 400-550W each. At 500W per panel:
Phoenix: 17,500W / 500W = 35 panels
Seattle: 56,250W / 500W = 113 panels
Panels can be wired in series (higher voltage, lower current) or parallel (lower voltage, higher current). Series configurations reduce wiring losses over long distances. Your charge controller voltage rating determines the configuration.
Step 3: Size the Battery Bank
The battery bank stores energy for nighttime operation and cloudy days. Undersized batteries lead to lights-out events. Oversized batteries waste money.
Determine Autonomy Days
Autonomy days represent how many consecutive cloudy days the system can handle without solar input.
| Scenario | Recommended Autonomy |
|---|---|
| Grid backup available (hybrid) | 1-2 days |
| Standard off-grid, sunny climate | 3 days |
| Standard off-grid, cloudy climate | 4-5 days |
| Critical operations (24/7, cold storage) | 5-7 days |
David is a facilities engineer in Phoenix. When he sized his first solar high bay system, he used 3 days of autonomy because Arizona is sunny. But he forgot that December brings 5.8 peak sun hours, not the annual average of 6.5. His battery bank hit 20% charge on a cloudy December afternoon. He added 30% more battery capacity the following year. Using worst-month sun hours for the solar array calculation would have caught this during design.
Calculate Battery Capacity
Battery capacity (Wh) = daily load (Wh) x autonomy days / depth of discharge
LiFePO4 batteries support 80-90% depth of discharge (DOD). Use 80% for longevity. Lead-acid batteries are limited to 50% DOD.
For our Phoenix example (3 days autonomy, LiFePO4 at 80% DOD):
64,800 Wh x 3 / 0.80 = 243,000 Wh (243 kWh)
For Seattle (5 days autonomy due to cloudier climate):
64,800 Wh x 5 / 0.80 = 405,000 Wh (405 kWh)
Convert to Battery Units
Standard LiFePO4 battery modules come in 5.12 kWh (48V, 100Ah) or 10.24 kWh (48V, 200Ah) configurations.
Phoenix: 243 kWh / 10.24 kWh = 23.7, round up to 24 batteries
Seattle: 405 kWh / 10.24 kWh = 39.6, round up to 40 batteries
Temperature Derating
Battery capacity drops in cold weather. LiFePO4 loses approximately 15-20% capacity at 32°F (0°C) and 25-30% at -4°F (-20°C). If your battery enclosure isn’t climate-controlled, add this derating to your calculation.
Sarah is a project manager evaluating a solar system for a cold storage facility in Wisconsin. Her initial battery sizing used 80% DOD and 3 days of autonomy. But the battery enclosure would sit on the roof, where January temperatures hit -10°F. She added a 25% temperature derating factor, increasing the battery bank from 243 kWh to 304 kWh. The extra $4,800 in batteries prevented a system failure during the first winter.
For a detailed comparison of battery chemistries, see our (LiFePO4 batteries for solar high bay lights guide).
Step 4: Select the Charge Controller

The charge controller regulates energy flow from the solar panels to the battery bank. Wrong sizing here damages batteries or wastes solar energy.
MPPT vs PWM
Pulse Width Modulation (PWM) controllers are simpler and cheaper, but they force panels to operate at battery voltage rather than their maximum power point. For a 48V battery system, a PWM controller wastes the voltage difference between panel output (typically 30-40V per panel in series strings) and battery voltage.
Maximum Power Point Tracking (MPPT) controllers continuously optimize the operating voltage to extract maximum energy from the panels. They’re 20-30% more efficient than PWM in real-world conditions.
For any solar high bay system over 200W, use MPPT. The efficiency gains pay for the cost difference within the first year.
Size the Controller
Controller current rating = panel wattage / battery voltage x 1.25 safety factor
For our Phoenix example (17.5 kW array, 48V battery bank):
17,500W / 48V x 1.25 = 455.7A
This requires multiple controller units. A common approach is to divide the array into strings, each connected to a separate controller. Four 100A MPPT controllers would handle the 456A requirement with margin.
The controller’s voltage rating must exceed the panel string’s open-circuit voltage (Voc). Check the panel datasheet for Voc at standard test conditions, then add a 10% margin for cold-weather voltage increase.
Complete Sizing Example: 20,000 Sq Ft Warehouse in Phoenix
Let’s put all four steps together for a facility in Phoenix, Arizona.
Facility Specifications
- Location: Phoenix, AZ (5.8 worst-month peak sun hours)
- Area: 20,000 sq ft
- Ceiling height: 30 ft
- Required illuminance: 30 foot-candles
- Operating hours: 12 hours/day
- Autonomy: 3 days
- Battery chemistry: LiFePO4 (80% DOD)
Full Calculation
Step 1: 36 fixtures x 150W x 12 hrs = 64,800 Wh/day
Step 2: 64,800 / 5.8 / 0.80 x 1.25 = 17,414W solar array (17.4 kW, 35 panels at 500W)
Step 3: 64,800 x 3 / 0.80 = 243,000 Wh battery bank (243 kWh, 24 batteries at 10.24 kWh)
Step 4: 17,400 / 48 x 1.25 = 453A charge controller (4 x 100A MPPT units)
Component Summary
| Component | Specification | Quantity | Est. Cost |
|---|---|---|---|
| LED Fixtures | 150W UFO, 22,500 lm | 36 | $7,200 |
| Solar Panels | 500W monocrystalline | 35 | $8,750 |
| LiFePO4 Battery | 48V 200Ah (10.24 kWh) | 24 | $24,000 |
| MPPT Controller | 48V 100A | 4 | $2,400 |
| Wiring and Mounting | DC rated, racking | – | $4,500 |
| Installation | Labor and commissioning | – | $6,000 |
| Total | $52,850 |
Payback Calculation
Previous grid cost at 0.14/kWh:36fixturesx150Wx12hrsx365days=236,520kWh/yearx0.14/kWh:36fixturesx150Wx12hrsx365days=236,520kWh/yearx0.14 = $3,311/year
Payback period: 52,850/52,850/3,311 = 16 years
This payback length is typical for grid-connected facilities with low electricity rates. Solar high bay systems make financial sense faster when trenching costs are involved (50,000−50,000−150,000 per mile), electricity rates exceed $0.20/kWh, or the facility lacks grid access entirely. Access Fixtures documented a solar LED parking lot case study showing 56.6% lower 10-year TCO compared to grid-powered equivalents. See our solar high bay lights vs grid-powered LED comparison for detailed ROI analysis by region.
Common Sizing Mistakes to Avoid

Marcus is a maintenance supervisor in Chicago. He sized his battery bank using 50% DOD because he’d previously worked with lead-acid batteries. He specified LiFePO4 but applied the old rule. His 243 kWh battery bank was twice the size he actually needed. The LiFePO4 batteries could have safely discharged to 80%, meaning he spent an extra $8,000 on capacity he never used.
Avoid these costly errors:
Using annual average peak sun hours instead of worst-month. Annual averages mask winter shortfalls. A system sized for 4.0 average hours will fail when December delivers 2.8 hours.
Ignoring temperature derating on batteries. Cold weather reduces effective capacity by 15-30%. If your battery enclosure isn’t heated, add this factor.
Undersizing the charge controller. A controller operating at 100% capacity degrades quickly. Always include the 1.25 safety factor.
Not accounting for system efficiency losses. Wiring, controller, dust, and temperature losses total 15-25%. Ignoring this leads to undersized arrays.
Forgetting to verify fixture spacing. Even perfectly sized solar systems fail if the lighting layout produces dark spots. Verify spacing-to-height ratios before finalizing fixture counts.
Specifying lead-acid for industrial applications. Lead-acid batteries deliver 500-1,000 cycles at 50% DOD. LiFePO4 delivers 4,000-6,000 cycles at 80% DOD. The 10-year TCO of lead-acid is 2-3x higher than LiFePO4.
Frequently Asked Questions
How many solar panels do I need for a 10,000 sq ft warehouse?
A 10,000 sq ft warehouse at 30 foot-candles with 12-hour daily runtime needs approximately 18 fixtures (150W each), consuming 32,400 Wh/day. In Phoenix (5.8 peak sun hours), that requires a 8.7 kW solar array with 17-18 panels at 500W each. In Seattle (1.8 peak sun hours), you’d need 28 kW with 56 panels.
What size battery bank for solar high bay lighting?
Battery bank size depends on daily load and autonomy days. For a 20,000 sq ft warehouse consuming 64,800 Wh/day with 3 days of autonomy and LiFePO4 at 80% DOD: 64,800 x 3 / 0.80 = 243 kWh. That’s approximately 24 battery modules at 10.24 kWh each.
Can I oversize the solar array?
Yes, oversizing by 25-50% is recommended. It accounts for cloudy days, panel degradation (0.5% per year), and future load growth. An oversized array also charges batteries faster, extending their cycle life by reducing depth of discharge.
How does ceiling height affect solar sizing?
Ceiling height affects fixture count and beam angle selection, which changes total wattage. Higher ceilings need fewer fixtures with narrower beam angles but higher lumen output per fixture. A 40 ft ceiling might use 24 fixtures at 200W instead of 36 fixtures at 150W. Total daily load stays similar, but fixture selection and spacing change.
What happens if I undersize the battery bank?
Undersized batteries discharge deeper than intended, reducing cycle life. A battery bank sized for 50% DOD that regularly hits 90% DOD will fail in 2-3 years instead of 10-15 years. Lights may also go out during extended cloudy periods.
Do I need a charge controller for every fixture?
No. One charge controller (or set of controllers) serves the entire solar array and battery bank. The battery bank then feeds all fixtures through a DC distribution panel. Size the controller(s) based on total array wattage, not individual fixtures.
Conclusion
Sizing a solar high bay lighting system comes down to four calculations: lighting load, solar array, battery bank, and charge controller. Each step depends on the previous one. Get the lighting load wrong and everything downstream is wrong.
The biggest variable is location. The same warehouse needs 3x more solar panels in Seattle than in Phoenix. Use worst-month peak sun hours, not annual averages. And don’t forget temperature derating on batteries if your enclosure isn’t climate-controlled.
Ready to get a customized sizing calculation for your facility? Probapro engineers provide free solar high bay assessments with location-specific system sizing, component selection, and ROI projections. Request your facility assessment and get a detailed system design tailored to your building and region.