Retrofitting from high bays to LED involves the upgrading of industrial fixtures for improved operations, saving energy from 60% to 75% and entirely cutting out maintenance cycle costs. This is a step-by-step outline for project planning, setting criteria for different systems, cracking the ROI, and carrying out the project while the workspace is still operational.
In other words, your ceiling pays a price for you every passing day. Aging metal halide and fluorescent high bays consume more electricity than you realize, depreciate far more quickly than what facility managers usually have in mind, and do not offer smart controls to optimize efficiency. Pupils are likely to pay at least double their wattage load if they are illuminated by 250- and 400-W metal halide lamps.
At the end of this guide, you shall know how to perform an inventory of the existing system, make fixture selections, calculate the payback time accurately, and conduct a retrofit in an in-service facility without interrupting production. Regardless of whether you are planning for a warehouse lighting retrofit at a 50,000 square foot distribution center or in one of the buildings at a multi-building manufacturing campus, the process is the same. If you are new to industrial LED upgrades, our complete guide to high bay LED lights covers the fundamentals before you dive into project planning.
Key Takeaways
- A 400W metal halide fixture actually draws ~458W including ballast losses, while a comparable 150W LED high bay delivers the same usable light for one-third the energy.
- Most warehouse retrofits cut lighting energy by 60-75% and pay for themselves in 1-3 years; with utility rebates, payback can drop to under 12 months.
- Choose UFO high bays for open spaces and linear high bays for narrow aisles; retrofit kits only make sense when existing housings are in good condition.
- Use a checkerboard installation pattern in active facilities to maintain safe light levels while you replace fixtures.
- Adding motion sensors and Bluetooth Mesh controls after the initial LED retrofit can boost total savings by an additional 30-50%.
What Is a High Bay Lighting Retrofit?

High bay light retrofit simply means upgrading existing high ceiling fixtures to LED technology devoid of a complete building renovation. The main issue thereon: lower down on energy consumption, reduce maintenance costs, and improve light quality still utilizing your existing infrastructure as much as possible.
When facility managers consider the word “retrofit,” they tend to visualize it as a whole tear-out, but that is not the case, though. Between upgrading from metal halide to LED inside the existing housing to removing the old metal halide and hanging new UFO or linear LED high bays, the actual retrofit scenario depends on what is available on your budget, the state of your ceiling, and whether you wish to choose smart control. For a deeper comparison of high-bay and low-bay lights, please refer to our complete (guide to high-bay vs low-bay lights).
Retrofit Kit vs Full Fixture Replacement
When Retrofit kits are specifically designed for quick installation. These kits include magnetic strips or complete LED arrays for high bay housings that will cost less. This does not often result in acceptable benefits of efficiency, optical results, or compatibility with smart controls when using LED fixture housing. Kit retrofits are never the clinical solution when high bay housings are in poor shape, corroded, or massively misorganized.
Full unit replacement is a process for the complete removal of the old metal halide or fluorescent light source and installation of a high bay lighting fixture. By replacing the housings, the new LED high bays offer the best heat dissipation, newest optics, and control network options for dimming, motion sensors, management, etc. For the majority of industries under around-the-clock operations, gendering more financial benefits is expected with replacement installation.
When Retrofit Makes Sense
Opt for a retrofit kit when your current housings are entirely functional, when you have checked and made sure that the wiring is up to the current electrical codes, and when your first goal is the cheapest energy savings. Choose a replacement fixture if the lighting system… needs better light distribution, wants smart controls, or wants to replace mechanically rough housing components. However, the goal is one at least for a high-bay lighting retrofit: to reduce operating costs and increase performance from day one.
Step 1: Audit Your Existing Lighting System
You cannot plan a high bay lighting retrofit without knowing what you currently have. Start with a fixture inventory. Walk the facility with a tablet or spreadsheet and record the count, type, and wattage of every high bay.
Fixture Inventory and Wattage Mapping
Do not trust the bulb label alone. A “400W” metal halide bulb actually draws approximately 458 watts once you include the ballast. A “250W” metal halide draws roughly 295 watts. These ballast losses are easy to overlook, but they add 15-20% to your baseline energy use. Record the actual system wattage for every fixture.
Observing mounting height, beam angle, and worse-for-wear condition of every fixture seem a sensible walkover on the floor; scan for damaged housings, corroded reflectors, or otherwise dark fixtures. The aforementioned factors decide if retrofits or full replacements are the way to go.
Operating Hours and Zone Profiling
Zone map your facility: bulk storage, racking aisles, shipping docks, production lines, and cold storage. Each zone is most likely running on its own unique schedule. A shipping dock might run 18 hours out of twenty-four, but the sweetest sound to a bulk storage area is the music of lights coming on between seven and three.
Mike, a facility manager in the 120,000-square-foot distribution center in Ohio, assumed that all fixtures ran the same hours. When he actually mapped the zones, he realized that 30% of his high bays were situated in areas that went dark two-thirds of the day. This zone profile alone changed his fixture count and an additional $8,000 per year into his ROI calculation.
Step 2: Choose the Right Fixtures for Your Retrofit

Not every LED high bay is the right fit for every space. The two primary options are UFO high bays and linear high bays. Choosing the wrong type will leave you with dark spots, wasted energy, or poor visibility on vertical surfaces.
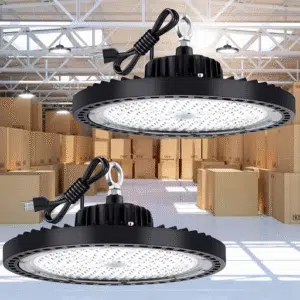
UFO High Bays for Open Spaces
UFO high bay lights are round, compact lights suited for wide interior spaces with tall ceilings. With beam angles reported in many UFO lights rated around 90 to 120 degrees, such fixtures give great lighting distribution over extended floor spaces. Naturally, they render well in those conditions in which the ortho-illumination is large against the ground-well. These could be bulk storage, open manufacturing floors, and gymnasiums.
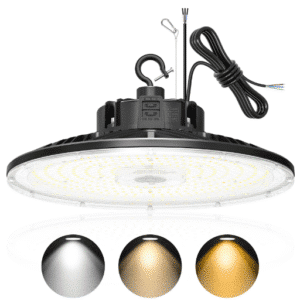
If at any time a high bay lighting retrofit is to take place in an open warehouse, UFO fixtures will usually give you the best geocentric illuminance per fixture. An Iess energy consuming 150W UFO high bay can take the place of a 400W metal halide unit, consuming one-third of the power. If you require industrial-grade robustness through all kinds of harshness, hunt down cast-aluminum housing of IP65 rating and IK08 rating. Our D11 UFO high bay provides an efficacy of 150-175+ lm/W and operates from -40°C to 50°C temp, suiting everything from freezers to foundries.
Linear High Bays for Narrow Aisles
Linear high bays are rectangular fixtures that focus light in a rectangular pattern. They excel in racking aisles, distribution centers, and narrow production lines where you need light on vertical surfaces such as shelf labels and barcodes.
If your facility has rows of pallet racking higher than 20 feet, linear fixtures will outperform UFOs. The directional beam reduces wasted light on the tops of racks and puts illumination where pickers actually need it. Our guide to UFO vs linear high bay lighting breaks down the exact spacing and photometric differences.
Wattage Replacement Guide
Use this table to match your existing metal halide wattage to the correct LED equivalent. Remember: the LED wattage is the actual draw, not a labeled figure with hidden ballast losses.
| Existing Metal Halide | Actual System Draw | LED Replacement | Energy Reduction |
|---|---|---|---|
| 250W MH | ~295W | 80-100W LED | 66-73% |
| 400W MH | ~458W | 150W LED | 67% |
| 1000W MH | ~1,080W | 300W LED | 72% |
The 400W-to-150W range metal halide to led retrofit is the sweet spot according to most warehouse setting, problems of weight and energy consumption are minimized while the intensity of the light made is essentially the same. The 200W UFO high bay is suitable for highly demanding applications requiring high lumen output assuming it is viewed as a replacement for a 1000W metal halide unit.
Step 3: Calculate Energy Savings and ROI

A high bay lighting retrofit is an investment, and facility managers need hard numbers to justify it. The good news is that the math is straightforward once you have your audit data.
Energy Savings Math
Start with your baseline. Multiply your total fixture count by the actual system wattage, then by your annual operating hours, then by your utility rate. The formula is:
Annual kWh = (Total Fixture Count x Actual Watts x Operating Hours) / 1,000
Now run the same calculation with your planned LED wattage. The difference is your annual energy savings.
Here is a real example. A facility with 100 fixtures running 400W metal halide at 12 hours per day and $0.12 per kWh:
- Baseline: 100 x 458W x 4,380 hours / 1,000 = 200,604 kWh/year = $24,072/year
- After retrofit (150W LED): 100 x 150W x 4,380 hours / 1,000 = 65,700 kWh/year = $7,884/year
- Annual electricity savings: $16,188
That is a 67% reduction in lighting energy costs from electricity alone. For a 24/7 operation, the savings roughly double. These figures align with industry retrofit benchmarks reported across commercial warehouse projects in 2025-2026.
Maintenance Cost Reduction
Maintenance is where a high bay luminaire retrofit would actually pay off. Metal halide lamps can become 10,000-20,000 hour life, washing out to 50% output by midlife at full power. A light-emitting diode (LED) would maintain at least 90% output worldwide for 50,000-100,000 hours.
On a practical note for metal halide high bay lighting in a 24/7 facility, relamps are necessary every 1-2 years. The cost to hire a lift, a licensed electrician, and downtime for any relamping is incurred. One 400W metal halide fixture can cost almost $980 over ten years in energy, lamps, and labor. A comparable LED fixture can save approximately $530 over the same time period. Maintenance savings will typically account for 15-25% of total project savings, which is fitting across all types of industrial retrofits.
Rebate and Tax Incentive Impact
Don’t leave money on the table. Most rebates require DLC 5.1 certified fixtures. Check the utility specific rebates before buying. By simply getting a rebate for 400W metal halide replacements, one would typically see range from $40 to $100 per fixture.
The second thing is that qualifying projects can have also claimed the 179D Energy Efficient Commercial Buildings Deduction, which enables up to $5.00 per square foot for retrofits that meaningfully reduce energy demand. So, for a 100,000-sq.ft. warehouse, this would be a $500,000 deduction for retrofits that meaningfully reduce energy use if the project met the thresholds.
But, factoring in incentives and rebates, most high bay lighting retrofit projects manage to achieve a payback of fewer than 12 months. In the absence of incentives, the average life of a payback is somewhere between 1.8 and 3.5 years.
Step 4: Installation Strategies for Live Facilities
The biggest fear in any retrofit is downtime. You cannot shut down a production line or clear a warehouse for days while crews swap fixtures. The solution is a phased installation plan.
Phased Checkerboard Approach
Your installation team may follow an approach for keeping the plant running during installation, which involves a checkerboard pattern. The way to approach is to replace every other fixture on one pass and the next to replace the remaining fixtures. It helps maintain the correct light levels throughout the working area and OSHA illumination standards compliance.
Prepare a map of your fixture grid before the crews arrive. Give a name to each fixture and with a Phase 1 or Phase 2 that shows which fixtures will come down during the two scheduled work phases. Distribute this map to the installation team so that everyone knows what routes are especially difficult in terms of being active work zones.
Off-Hours and Lift Logistics
Coordinate lift rentals by zone, not by fixture. If you rent a scissor lift for the west side of the building, replace every fixture in that zone before the lift leaves. Mobilizing and demobilizing lift equipment is expensive; grouping the work minimizes those costs.
Schedule the noisiest work during off-shifts when possible. In 24/7 facilities, coordinate with operations to avoid high-traffic periods. A well-planned high bay lighting retrofit should add zero downtime to your operation.
In 2024, a 250,000-square-foot cold storage facility in Ontario retrofitted 312 fixtures using this exact phased approach. They replaced 400W metal halide units with 180W LED UFO high bays. The project saved 552,960 kWh in the first year, cut electricity costs by 74,650, and eliminated 74,650, and eliminated 22,464 in annual maintenance. Total payback: 7.8 months after utility rebates. If you need to dig deeper into how ceiling structure affects fixture placement, our guide on (ceiling height for high bay lighting) covers the full framework.
Step 5: Add Smart Controls to Your Retrofit

The majority of energy conservation comes from the first LED retrofit. However, combining smart controls together with your high bay lights is sure to save you more and more. It’s just phase two, not a retrofit.
Motion Sensors and Daylight Harvesting
Occupancy sensors, for example, may decrease runtime by 20-35% in lesser-used areas such as bulk storage, receiving docks, and break rooms. On cycles, on the other hand, metal halide lamps take 10-15 minutes to warm up and do not do well with switching on and off frequently; LED high bays are direct on and off. Spot on: they can cycle thousands of times without causing them to change their operating characteristics.
Daylight harvesting technology dims lights near skylights and windows with respect to the ambient light level. During a bright afternoon, fixtures located near the roof line can be dimmed to half output level, while still providing safe and ample illumination-this is savings in a free mode with no behavior change overtly required.
Bluetooth Mesh and Networked Controls
Your setup has numerous schedules differing between zones. Bluetooth Mesh enables wireless control, allowing for central control of your fixtures with not many or even sometimes no communication control cables running along them. Fixture grouping, schedule setup, watch over energy use–all possible from one single dashboard.
Back at her 200,000 square feet hub in Dallas, Operations Director Sarah completed her first round of high bay lighting retrofit in March 2025. Six months later, she mated 40% of her fixtures with motion sensors and applied daylight sensors to the zones under skylights. The result: No less than a 28% extra saving in lighting energy on top of the 64% from the existing LED conversion.
Interested in smart controls for your retrofit? Learn more about our Bluetooth Mesh and sensor-enabled high bay solutions.
Common High Bay Retrofit Mistakes to Avoid
Even experienced facility managers make these errors. Avoid them and your retrofit will stay on budget and on schedule.
- Ignoring ballast losses in baseline calculations. A 400W MH fixture draws ~458W. If you use 400W in your savings model, you will understate your actual ROI by 15%.
- Choosing the wrong beam angle for the ceiling height. A 120° beam at 35 feet creates a pool of light on the floor but wastes lumens on the walls. Match beam angle to mounting height and floor layout.
- Skipping photometric review and ending with dark spots. Always run a lighting layout calculation before you buy. Free photometric software is widely available, and most reputable suppliers will run it for you.
- Forgetting to file for utility rebates before purchasing. Many rebate programs require pre-approval. Buy first, file later, and you may disqualify yourself from thousands in incentives.
- Installing without a phased plan in an active facility. Do not let installers work randomly across the floor. A checkerboard plan keeps your facility safe and operational.
Conclusion
Properly planned lighting retrofit in a high-bay area results in a huge energy saving of 60-75%, completely takes away all maintenance cycles that practically pays you back from project execution within a matter of 3 years. The process is simple but necessarily requires a systematic approach: check out supplies, choice of system, assessments of the real ROI, considering ballast losses, and implementing accordingly so as not to interfere with daily operations.
Projects that are most successful do not merely replace the old equipment. They plan to extend into motion sensors, smart controls, and daylight harvesting in a second phase which will drive the total savings even higher. Great light, low cost, and no downtime should not conflict but coalesce as a natural consequence of doing smart retrofit.
Get a Quote
Ready to plan your high bay lighting retrofit? Contact our team for a free facility audit, photometric layout, and custom quote. We will calculate your exact energy savings, payback timeline, and rebate eligibility so you can make a confident, data-driven decision.