Sarah’s 40,000 square feet of new distribution really seemed good at the onset. Until lights went in. At the most basic level, Sarah’s team installed fixtures at carried intervals across the ceiling, surprisingly enough. Within the first week, the pickers had begun complaining about the darkness in the aisles. The shadows between the racks were severely darkening the places from which most product was picked. At the loading docks, the illumination was brilliant while in recessed corners, total darkness crept in. Sarah had to swallow a hefty sum of $28,000 invested in a warehouse lighting layout project that aided in the operations.
If you were the one designing/retrofitting a facility, you would never feel the urgency of getting it done once right, and rightly so. Having a reliable plan in place for your warehouse lighting layout, then, isn’t a hit-and-miss affair but a predictable regimen based on ceiling height, activity requirements, and performance of fixtures. This guide will take you through that process step by step. At the end of it, you won’t be in darkness regarding the number of fixtures needed, their positioning, common errors to avoid, and what will be a drag on operational performance and budget.
Step 1: Define Your Light Level Targets

One must get to know the required light levels of the zones before jumping on to select a respective luminaire. The standard unit of industrial lighting usually used in the United States is foot-candles or lux; remember that one foot-candle equals about 10.76 lux. Hence, since we are referring to the United States, let us refer in foot-candles.
Unfortunately, the Illuminating Engineering Society of North America (IESNA) does not have specifying minimum light levels; they only provide guidelines resting upon the type of work performed in the area. OSHA supplies a method of reckoning lower limits, but the refined standards from the IESNA are the level to strive for. Following is a guide of the suggested light levels:
- ·For unclassified large storage facilities: 10–20 fc;
- ·For active-type order picking and packing: 30–50 fc;
- ·For manufacturing areas and assembly areas: 50–75 fc;
- ·For detailed inspection and quality control (this requires a lot of light): 75–100+ fc;
- ·Loading docks: 30–50 fc;
- ·For aisle-only desolate zones: 10–20 fc.
A lighting composed with what the regulations foresight of minimum light standards might cost lower to start but magnificently incurs errors, safety incidents, and worker compensation payouts. So establishing a good warehouse light design is more than simply providing enough light. This particular light should accurately integrate the functionality of the area in each light level.
Step 2: Choose the Right Fixture Type
Not all warehouse spaces need the same type of lighting. The shape of your space and the position of the racks will give you either UFO highbays, long and linear high bays, or Low Bays.
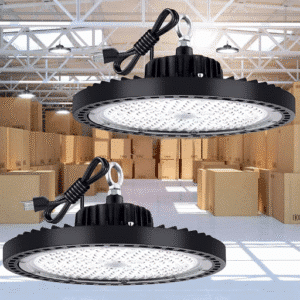
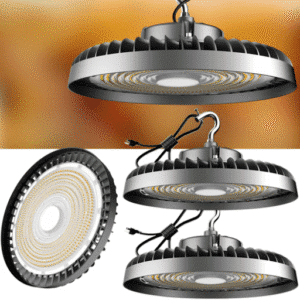
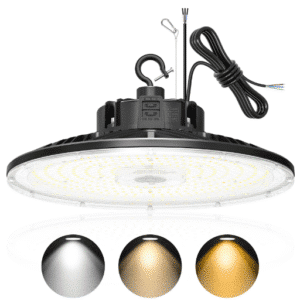
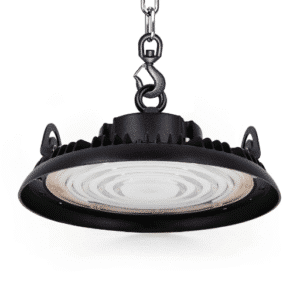
UFO High Bays for Open Areas
UFO High Bays are compact, round LED fixtures that are specifically designed to do their job in ceilings taller than 20 feet. These fixtures can deliver intense light to a designated area with minimal output. UFO high bays are perfect for every space having a relatively open space not burdened with tall obstructions. They are quickly installed and have a high lumen-per-watt delivering capabilities.
Linear High Bays for Aisles
If a warehouse has very limited areas dominated by narrow aisle paths and tall racking, then the long and linear high bays may be a better fit than UFOs. Encasing lights across the length of the aisle linearly spreads the light, resulting in more even lighting of the rack faces in the vertical. There are very many facilities opting for a hybrid approach: UFOs over open staging areas, and linear fixtures over aisles.
Low Bays and Task Lights
Low bay fixtures or task lights are best suited for ceilings under 20 feet, packing stations, or detailed workbenches. They provide directed light with the least amount of glare and no unnecessary upward spillage.
Quick Fixture Selection Checklist
- Ceilings over 25 feet with open floor: Pick UFO high bays.
- Narrow aisles with tall racking: Choose linear high bays.
- Ceilings under 20 feet or workstations: Low bay or task lights.
- Mixed environments: Hybrid of UFO and linear fixtures.
Our (high bay lighting installation guide) walks through mounting methods, electrical requirements, and safety protocols
Step 3: Calculate How Many Fixtures You Need

Now comes the math. Professionals use a version of the lumen method to estimate fixture quantity. You do not need expensive software to get a reliable first draft.
Here is the formula:
Total Lumens Required = (Square Footage × Target Foot-Candles) ÷ (Coefficient of Utilization × Light Loss Factor)
Then:
Number of Fixtures = Total Lumens Required ÷ Lumens Per Fixture
Let us break down each variable.
- Area in square footage: The usable floor space that is being lit in the zone.
- Target foot-candles: The level of light that we are considering in Step 1.
- Coefficient of Utilization (CU): Provides the amount of light actually reaching the work plane after the absorption that happens by walls and floors. For spaces featuring relatively dark floors from unpainted steel, a value of 0.5 will sound through; and a range of 0.6 to 0.7 would be appropriate for lighter areas having white walls.
- Light Loss Factor (LLF): Accounts for dust and dirt as well as very minor impact on lumen maintenance. The LED may typically offer a conservative value of 0.8 to 0.85.
If you have not calculated total lumens yet, start with our guide on (how many lumens you need for high bay lighting) .
Worked Example
Imagine a 20,000-square-foot active picking zone with a 30-foot ceiling. You want 30 foot-candles. You are considering 150W UFO high bays that deliver 22,500 lumens each. The warehouse has dark concrete floors, so you will use a CU of 0.55 and an LLF of 0.85.
Total Lumens Required = (20,000 × 30) ÷ (0.55 × 0.85) = 600,000 ÷ 0.4675 = 1,283,422 lumens
Number of Fixtures = 1,283,422 ÷ 22,500 = ~57 fixtures
That gives you a solid starting point. You would round up to 57 or 58 fixtures, then refine spacing in the next step.
Step 4: Determine Fixture Spacing
Quantity tells you how many fixtures to buy. Spacing tells you where to put them. The guiding rule is the Spacing-to-Height Ratio (SHR).
Spacing = Mounting Height × 1.0 to 1.5
Use the lower end of that range for demanding task areas, lower ceilings, or spaces with obstructions. Use the higher end only for wide-open rooms with broad-beam optics and moderate light level requirements.
Here is a quick reference table:
| Mounting Height | Recommended Spacing | Typical Wattage |
|---|---|---|
| 15 ft | 12–15 ft apart | 100–150W |
| 20 ft | 15–18 ft apart | 150–200W |
| 25 ft | 18–22 ft apart | 200–240W |
| 30 ft | 20–25 ft apart | 240–320W |
| 35 ft+ | 22–30 ft apart | 320–500W |
For a deeper dive on matching wattage to ceiling height, see our (high bay light wattage guide).
The Wall Offset Rule
A common landscape mistake is dark edges. Avoid them by placing the first fixture row half-way between the wall and lights. In other words, if your fixtures are 20 feet apart, set about 10 feet from the wall. This effect clears perimeter shadowing.
Aisle-Oriented Layouts
Center fixtures as best as you can directly over aisles, not on a strict grid. in a racking environment, the aisleways are where the work actually gets done- centering fixtures over these spacesus. Put even more light right in the elbows of the pickers and not above the racks where more light is simply wasted.
Step 5: Account for Racking and Obstructions
When Marcus selected the lights for that auto-parts warehouse outside Illinois, he assumed every time they were set in a position that reached 30 feet high ceilings. The effect, consequently, was the lights being situated 25 feet apart; further, those deep shadows cast on the low PLUS there was a shortfall below the top rack. Pickers had resort to floodlights to work in the dark.
This extension also brings down your effective illumination height. For example, should the beam be generated by a ceiling that reaches 30 feet, the bottom level is left at a height with barely 8 feet of clear throw over the top rack beam. When dealing with such tight spacing, it is necessary to consider higher output, tighter spacing, or fixtures with more precise beam angles.
Beam Angle Selection
Beam angle is as significant as the wattage. A 60° beam angle would focus light into a very tight cone, excellent for heights. A 120° beam is better to spread light across a wide area, good for low ceilings and general coverage. For all warehouses with 20 to 30-foot ceilings, the best balance can be achieved by 90° to 120° beam angles.
ProbaPro’s 90° UFO high bay will be able to cover about 25 to 30 feet in diameter at floor level when a 30-foot ceiling and open floor layout exist. On adding 20 feet for additional racking, this beam may now be halved. Thus, engaging your space calculations would need obstructions.
Step 6: Plan for Smart Controls and Zoning
The layout of warehouse lighting must not appear like a single uniform grid design; on the contrary, it must appear as a collection of individually controlled zones- controlled according to the usage.
Motion Sensors in Low-Traffic Aisles
Lighting kept on in an aisle 12 hours a day for the sparsely used foot traffic may be only wasted money. Occupancy sensors to dim and turn off the lights when the aisle is empty and back to either full bright instantly upon motion detection. Also, LEDs pair well with sensors, as LED is instant-on, and this is not really possible with metal halides.
Daylight Harvesting Near Skylights
If your warehouse has skylights or window bands, daylight sensors will work to diminish the artificial light in some parts of the warehouse when there is natural light. In zones with strong daylight, it can save as much as 60% artificial lighting during daylight hours.
Task Zoning
Layout should be divided into zones that correspond to various functions, such as open area, aisles, loading areas, packing stations, and offices. Each zone should be provided with its own fixture type, targeted light levels, type of control, and so on. Zoning helps control unnecessary over-lighting in areas where goods or storage items are kept, while at the same time reducing the chances of “task” areas lacking the amount of light they actually need.
Want to add smart controls to your layout? Explore our [ufo high bay light]options with built-in sensor and dimming compatibility.
Common Warehouse Lighting Layout Mistakes

Even the well-seasoned facilities teams make these errors; thousands of dollars and months of frustration can be avoided.
Using Ceiling Height Instead of Mounting Height
Often, the fixtures drop 2 to 4 feet below the ceiling deck. So the spacing must be kept according to the mounting height, not the architectural height of the ceiling, due to the distance of those few feet. This certainly incurs the coverage area.
Ignoring Beam Angle
The lumens of the luminaire give us the amount of light we need; an arc of light tells us where it is pointing. Hence a 30,000-lumen water fixture with a 60° beam would see less coverage than its 22,500-lumen counterpart, with an arc of twice the angle to 120°. Beam angle selection needs matching to the height of fixtures in light of the tasks performed below.
Minimizing Fixture Count Too Aggressively
Reducing spacing to its absolute minimum to save additional money induces dark pockets and ugly uniformity. Adding more fixtures is usually better than dealing with abhorrent looks, safety concerns and reinstallation with demurrage.
Skipping the Photometric Check on Large Projects
For projects covering more than 50,000 square feet or having complexly zoned racking, having a photometric study may be well worth the cost. Software like DIALux or AGi32 and Manufacturers’ IES files are used to model light levels before even one fixture is hung. Many reputable manufacturers can provide IES files upon request, including Probapro. The cost of a photometric layout is typically a few hundred bucks but can avoid costs one cannot imagine for rework.
Mixing UFO and Linear Without a Plan
Both have their applications. However, if just mixed willy-nilly without thinking about aisle width, rack height, and coverage patterns, expect to blot some light. Reach a conscious decision on going with the UFO or linear type.
Need help sizing gym high bay lighting for your specific facility? Start with our (gym high bay lighting guide).
Conclusion
Warehouse Lighting Layout is far more than the addition of some brightness into the building. Apart from that, it increases the hit-rate, reduces wasteful spending on energy, and makes for a much safer work environment in general. The process is simple when you take it step by step. Set up your light level targets, pick the right type of fixtures, calculate the required quantity from the lumen method, space the fixtures according to the mounting height, consider obstructions, and then layering the last control strategy.
Sarah ultimately went through this process and repositioned her fixtures. She added 12 fixtures in the shadowed aisles, centered her grid properly over the walkways, and integrated motion sensors in the middle of the warehouse in low-traffic zones. Her electricity bill reduced by 18%, and error rates fell by almost 15%.
You do not need to learn the hard way. Get the layout right before installation, and your lighting will work as hard as your team does.