Solar high bay light installation follows a different rulebook than standard AC fixture installation. You’re not just hanging lights and connecting hot-neutral-ground. You are installing a DC power generation and storage system that runs from the rooftop solar array through a charge controller, into a battery bank, and out to DC-native fixtures on the ceiling. Each step adds complexity that AC electricians have never encountered.
An experienced commercial electrician with fifteen years of AC wiring experience made a $4,200 mistake in ten seconds. He treated a 48V DC solar high bay circuit like a 277V AC line. He reversed the polarity.
The charge controller failed instantly. The battery management system locked out. The entire lighting zone went dark before it ever saw its first sunset.
That story is not unusual. Most installation guides assume AC power. Solar systems use DC from panel to fixture, which means different breakers, polarized connectors, and safety procedures.
NEC Article 690 governs solar PV systems, not Article 410. DC arcs don’t self-extinguish like AC arcs. And a battery bank weighing 3,000 pounds needs structural analysis before it goes anywhere near your warehouse floor.
This guide covers the complete solar high bay light installation process. You’ll see how to mount the solar array, place and wire the battery bank, install the charge controller, run DC wiring to fixtures, and commission the system without destroying equipment. For the complete solar high bay overview, start with our (solar high bay lights complete guide).
Key Takeaways
- Solar high bay installation requires NEC Article 690 compliance, DC-rated breakers, and polarity verification at every connection — AC wiring experience alone is not enough.
- A typical warehouse installation takes 7-10 days (vs 2-3 days for AC): 3-4 days for the solar array, 1-2 days for battery and controller, and 2-3 days for fixtures and DC wiring.
- The commissioning sequence is critical: connect battery first, then array (breaker open, then close), then test fixtures one circuit at a time.
How Solar High Bay Installation Differs from AC

Solar high bay light installation is not an AC retrofit with panels added on top. The entire electrical architecture changes. Understanding those differences prevents the most expensive and dangerous mistakes.
Voltage Type and Safety
AC current crosses zero 120 times per second at 60 Hz. That zero-crossing is what lets AC arcs self-extinguish when a breaker opens. DC current has no zero-crossing.
A DC arc sustains itself, reaches temperatures above 3,000C, and will weld an AC-rated breaker shut. That’s why NEC Article 690 requires DC-rated breakers on every solar circuit. An AC breaker on a DC line is a fire hazard, not protection.
Polarity matters on DC in ways it doesn’t on AC. Reverse hot and neutral on an AC LED fixture and it still works. Reverse positive and negative on a DC solar high bay and you’ll destroy the charge controller, the fixture driver, or the battery management system.
| Factor | AC High Bay | Solar DC High Bay |
|---|---|---|
| Voltage type | 120-277V AC | 12-48V DC |
| Arc behavior | Self-extinguishes at zero-crossing | Sustains; welds AC breakers |
| Breaker requirement | AC-rated | DC-rated per NEC 690.9 |
| Polarity | Non-polarized | Polarized; reversal damages electronics |
| Governing code | NEC Article 410 | NEC Article 690 |
| Wire sizing | Standard gauge | Larger gauge for voltage drop |
Every DC connection must be verified before energizing.
System Architecture Impact on Installation
A solar high bay system has three distinct installation zones. The solar array sits on the roof or ground. The battery bank and charge controller live in a dedicated room or enclosure.
The fixtures hang from the ceiling. Wire runs are longer than AC systems because power flows from roof to battery room to fixtures. Grounding must connect the array frame, battery enclosure, and fixture housings into a single continuous system.
There’s no utility interconnection process, which simplifies permits in some ways. But there’s also no grid fallback during installation. If the battery is not charged and the sun is down, you have no power for tools or testing.
Pre-Installation Planning and Permits
Skip the planning phase and you’re the fastest way to fail inspection or create hazardous conditions.
Structural Analysis for Panel Mounting
A commercial solar panel adds 2-4 pounds per square foot including racking. Most commercial roofs handle 20-30 pounds per square foot live load, but you need a structural engineer to verify that for your specific building age, condition, and snow load zone. Wind uplift is the bigger concern for exposed arrays — panels act like sails, and poorly anchored racking can tear off in high winds.
Roof penetrations for conduit drops must be flashed and sealed to prevent leaks. This is standard roofing work, but it is work that most AC lighting contractors do not perform. Plan for a roofer or a solar contractor to handle this phase, not your usual electrical crew.
Electrical Permits and Inspections
NEC Article 690 governs all solar photovoltaic system installations. Article 480 governs storage batteries. Your local authority having jurisdiction (AHJ) will require an electrical permit for any system above a few hundred watts. Indoor battery banks may trigger fire department review under NFPA 855 if capacity exceeds 20 kWh.
For the system sizing that determines your permit scope, see our guide on (how to size a solar high bay lighting system).
Tools and Materials Specific to Solar Installation
Solar high bay light installation requires tools that standard electrical contractors may not carry:
- DC-rated crimping tools for MC4 solar panel connectors
- DC circuit breaker panel with breakers rated for your system voltage
- Multimeter with DC amp clamp for measuring panel output and load current
- Torque wrench for battery terminals (undertorqued terminals overheat; overtorqued terminals strip)
- Conduit bender for DC-rated conduit runs
Solar Panel Mounting and Array Installation

The solar array is the first physical component to install. Get it right, and the rest of the system has a reliable power source. Get it wrong, and you are chasing shading, grounding, and leakage problems for years.
Roof-Mounted Arrays
Roof-mounted arrays use the existing warehouse structure. They’re protected from ground-level damage and theft. But they require structural analysis to confirm load capacity.
South-facing orientation with a tilt angle matching local latitude maximizes year-round output. If the roof doesn’t face south, east-west split arrays can work but require larger total capacity.
Wire management matters more than most installers expect. Each panel has a junction box with MC4 connectors. These connectors must be protected from UV exposure, physical damage, and water intrusion. Conduit drops from the roof to the interior battery room must be sealed at the penetration point.
The array frame must be bonded to the building grounding electrode system per NEC 690.43. This isn’t optional — an ungrounded array frame can become energized during a fault and create a shock hazard.
Ground-Mounted Arrays
Ground-mounted arrays sit on dedicated racking in an open area near the facility. They are easier to clean and maintain but require fencing and security measures. They are the best option when roof orientation is suboptimal or roof load capacity is insufficient.
Ground arrays need concrete piers or ballasted foundations rated for local wind and snow loads. DC conduit must be trenched from the array to the battery room. In rocky or frozen ground, trenching can add significant cost and time.
Panel-to-Controller Wiring
Conduit sizing for DC conductors is typically larger than an equivalent AC system because DC operates at lower voltage (48V vs 277V). Lower voltage means higher current for the same power, which means larger wire gauge and more voltage drop.
Voltage drop should not exceed 2% for the array-to-controller run. For example, a 24kW array at 48V produces 500A at full output. Even at 50 feet, 500A requires 4/0 AWG cable or multiple parallel runs to keep voltage drop within spec.
MC4 connectors must be assembled with a proper crimping tool. Hand-tightened or poorly crimped MC4 connections create high-resistance joints that overheat and can start fires. Don’t skip the crimp die. Always use the manufacturer-specified crimp die.
Battery Bank Installation and Enclosure Design
The battery bank is the most expensive component and the heaviest. It is also the most dangerous if installed incorrectly.
Battery Room Location and Clearances
LiFePO4 batteries perform best between 50-85F (10-30C). The battery room should be centrally located to minimize cable runs to both the controller and the fixtures. But it must also be accessible for maintenance, protected from temperature extremes, and structurally rated for the weight.
A 360 kWh LiFePO4 battery bank weighs 3,000-4,500 pounds. Most commercial floors handle this load, but older buildings with wood joists or compromised slabs need structural analysis. In one Ohio cold storage retrofit, the facility had to reinforce floor joists before installing a 2,800-pound battery rack.
NEC requires 36 inches of clear space in front of battery racks and 12 inches on the sides. This isn’t a suggestion — inspectors measure it. Plan your room layout before the batteries arrive.
Ventilation and Temperature Management
LiFePO4 chemistry produces minimal hydrogen gas compared to lead-acid. But ventilation is still required. Passive ventilation with intake and exhaust vents is standard. In extreme climates, active management is needed:
- Cold climates: Insulated enclosure with a thermostatically controlled heater prevents capacity loss below freezing.
- Hot climates: Ventilation, shade structure, or active cooling prevents accelerated degradation above 95F.
For detailed battery guidance, see our (LiFePO4 battery guide for solar high bay lights).
Battery Wiring and Busbars
Batteries are wired in series to reach the target system voltage (48V standard for industrial systems). Parallel strings increase capacity. Each series string needs fuse protection. The BMS monitors cell voltages and temperatures and will disconnect the bank if any cell goes out of spec.
Terminal torque specifications are critical. A loose terminal creates resistance, which creates heat, which can damage the battery or start a fire. Use a torque wrench set to the manufacturer’s spec. Recheck torque after 30 days of operation — thermal cycling can loosen connections.
Charge Controller and DC Distribution Installation
The charge controller is the brain of the system. It regulates charging, protects the battery, and distributes power to the fixtures.
Controller Mounting and Wiring
Mount the controller as close to the battery bank as possible. This minimizes voltage drop on the battery-to-controller run and lets the controller sense true battery voltage. Most MPPT controllers are rated for indoor use only — do not install them in unconditioned outdoor enclosures unless the manufacturer explicitly allows it.
Three DC breakers are required:
- Array breaker: Between solar panels and controller input
- Battery breaker: Between controller and battery bank
- Load breaker: Between controller and fixture distribution panel
Each breaker must be DC-rated for the system voltage and current. Label every breaker clearly. During maintenance, you’ll need to know which breaker disconnects which circuit.
DC Distribution Panel
The DC distribution panel feeds individual fixture circuits. Each circuit needs its own DC breaker sized for the wire gauge and load. NEC 690.9 requires overcurrent protection on all ungrounded conductors.
Wire sizing for DC lighting circuits is more critical than AC because voltage drop has a larger impact at 48V than at 277V. A 3% voltage drop on a 48V system is only 1.44V. That same 3% on a 277V system is 8.31V.
The lower the system voltage, the more precise your wire sizing must be.
Grounding the DC System
The DC grounding system must bond the array frame, battery enclosure, controller chassis, and fixture housings to the building grounding electrode. Use continuous equipment grounding conductors in every conduit run. Don’t rely on conduit alone as the ground path — that’s an AC shortcut that doesn’t meet NEC 690 requirements for solar systems.
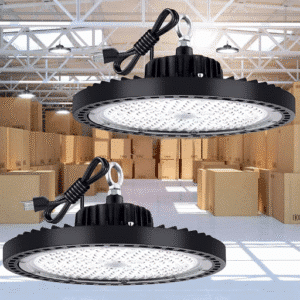
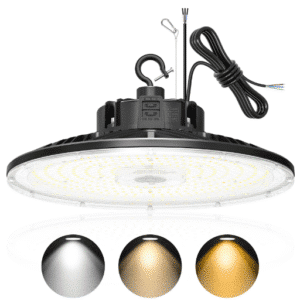
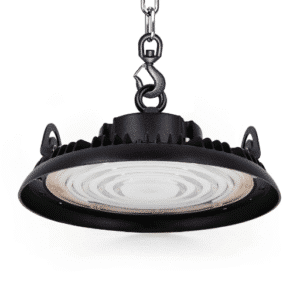
Fixture Mounting and DC Wiring

Fixture mounting is the one area where solar high bay light installation is similar to AC installation. The differences appear in the wiring.
Mounting Methods
Hook mount, chain mount, and pendant mount all work the same way as AC fixtures. Hardware must be rated for 3-4 times the fixture weight. The one additional consideration for solar DC fixtures is that some models are slightly heavier due to integrated driverless design — verify the actual weight before selecting hardware.
DC Fixture Wiring
DC-native fixtures must match the battery bank voltage. A 48V fixture on a 24V bank will not light properly. A 24V fixture on a 48V bank will be destroyed instantly. Verify the voltage rating on every fixture label before connecting.
Polarity verification is non-negotiable. Use a multimeter to confirm positive and negative at every junction. Mark conductors with red (+) and black (-) tape at both ends. Color consistency prevents the reversal mistake that destroyed the charge controller in our opening story.
Voltage Drop Calculation for DC Lighting
The voltage drop formula for DC circuits is:
VD = (2 x L x I x R) / 1000
Where L is one-way distance in feet, I is current in amps, and R is wire resistance in ohms per 1,000 feet.
For example: a 48V system with a 100-foot run, 10A load, and 10 AWG wire (R = 1.02 ohms per 1,000 ft):
- VD = (2 x 100 x 10 x 1.02) / 1000 = 2.04V
- Percentage drop: 2.04 / 48 = 4.3%
That exceeds the 3% target. You would need 8 AWG wire (R = 0.64) to get under 3%. For long DC runs, upsizing wire is not optional — it is required for proper fixture operation.
Commissioning and Startup Procedure
Commissioning is where most self-installed systems fail. The sequence matters. The settings matter. And one skipped check can cost thousands.
Pre-Energization Checks
Before connecting anything, verify:
- Polarity at every connection point (array to controller, controller to battery, battery to distribution, distribution to fixtures)
- Ground continuity from array frame to battery enclosure to fixture housings
- Insulation resistance with a megger test (minimum 1 megohm for 48V systems)
- Terminal torque on every battery and busbar connection
When the crew at a Nevada mining warehouse skipped the polarity check on their first solar high bay installation, they connected the entire 48V fixture bank in reverse. The fixtures had reverse-polarity protection, which saved the LEDs.
But the inrush current when they corrected the polarity blew the DC distribution fuses. Two hours of downtime, $180 in fuses, and a very red-faced lead electrician.
Controller Configuration
Power on the controller before connecting the array. Configure these settings:
- Battery type: LiFePO4 (sets charging voltage profile)
- Charging voltage: 14.2V per 12V block (56.8V for 48V system)
- Load disconnect voltage: 10.5V per 12V block (42V for 48V system)
- Timer or photocell: Set for local dusk-to-dawn or scheduled runtime
The charging voltage for LiFePO4 is lower than lead-acid. If the controller is left on the default lead-acid profile, it will undercharge LiFePO4 cells and reduce capacity by 15-20%.
System Startup Sequence
Follow this exact order. Don’t improvise.
- Connect battery bank first — this gives the controller its reference voltage
- Connect solar array second — with the array breaker open, wire the panels, then close the breaker
- Verify controller display — confirm charging status, battery voltage, and panel voltage
- Test fixture circuits one at a time — close one load breaker, verify all fixtures on that circuit, then move to the next
- Record baseline readings — panel voltage at midday, battery SoC at dawn and dusk, load current during operation
Post-Startup Verification
Use a light meter to measure foot-candles at the work plane. Take readings at multiple points across the space, including corners and midpoints between fixtures. Compare to your targets: 20-30 fc for warehouse storage, 30-50 fc for assembly.
Check battery voltage under load and during charging. A healthy 48V LiFePO4 bank reads 52-54V at full charge and should not drop below 48V under normal load. If voltage sags below 46V during operation, your battery bank is undersized or a cell is failing.
Installation in Active Facilities

Most solar high bay light installation guides assume an empty warehouse. In reality, you are probably retrofitting a facility that needs to keep operating.
Phased Installation Strategy
Install the solar array and battery room first. These phases create zero disruption to warehouse operations. Wire fixture circuits during off-shifts. Commission zone by zone so only a portion of the facility is offline at any time.
The Arizona distribution center that installed 32 solar high bays completed their project in nine days. Days 1-4 were array and battery room work with the warehouse fully operational. Days 5-6 were controller and distribution panel installation.
Days 7-9 were fixture mounting and DC wiring during weekend shifts. Total operational disruption: zero weekday hours.
Temporary Power During Installation
Unlike AC retrofits, you cannot tap the existing grid for temporary power during a solar installation. The battery bank is your only power source, and it should stay disconnected until all wiring is complete. Plan for portable power (generator or battery-powered tools) for the construction phase.
Safety During Active Operations
DC circuits cannot be turned off at a remote panel like AC. Each circuit needs its own local DC breaker. Lockout/tagout procedures for DC systems require tagging every breaker in the chain — array, battery, and load — because de-energizing one point does not de-energize the entire system.
Frequently Asked Questions
Can a standard electrician install a solar high bay system?
A licensed electrician can handle most of the work, but solar-specific knowledge is required for DC breaker selection, polarity verification, and charge controller configuration. If your electrician has never worked with NEC Article 690, hire a solar contractor for the array and controller portions.
Do I need a permit for solar high bay installation?
Yes. Electrical permits are required for systems above a few hundred watts. Building permits may be needed for roof-mounted arrays or ground-mounted racking. Indoor battery banks over 20 kWh may trigger fire department review under NFPA 855.
How long does solar high bay installation take?
A typical warehouse system takes 7-10 days: 3-4 days for the solar array, 1-2 days for battery and controller installation, and 2-3 days for fixtures and DC wiring. This is 2-3 times longer than an equivalent AC retrofit due to the additional components.
What is the biggest mistake during solar high bay installation?
Reversing DC polarity is the most common and most expensive mistake. It destroys charge controllers, damages BMS units, and can blow fuses throughout the system. Always verify polarity with a multimeter before making any DC connection.
Can I install solar panels on any warehouse roof?
No. The roof must support the additional 2-4 lbs per square foot of panels plus racking, plus local wind and snow loads. Older buildings need structural analysis. Roof orientation and shading also affect whether the roof is suitable.
How far can the battery bank be from the fixtures?
There is no fixed maximum, but voltage drop limits practical distance. At 48V, keep fixture runs under 150 feet for 10A circuits with 10 AWG wire. For longer runs, upsize the wire or add a DC distribution panel closer to the fixture zone.
What wire gauge do I need for DC high bay fixtures?
It depends on current, distance, and acceptable voltage drop. A 150W fixture at 48V draws 3.1A. At 100 feet with 3% voltage drop target, you need 12 AWG wire. At 200 feet, you need 10 AWG. Always calculate voltage drop for your specific run lengths.
Do solar high bays need grounding?
Yes. The array frame, battery enclosure, controller chassis, and all fixture housings must be bonded to the building grounding electrode system per NEC 690. Use dedicated equipment grounding conductors in every conduit run.
Can I install solar high bays without shutting down my warehouse?
Yes. Use a phased approach: install array and battery room during normal operations, then wire fixtures and commission during off-shifts or weekends. The existing AC system can stay online until the solar system is fully commissioned and tested.
What should be on my commissioning checklist?
Verify polarity at every connection, confirm ground continuity, torque all battery terminals, configure controller for LiFePO4 chemistry, record baseline voltage readings, test each fixture circuit individually, and measure foot-candles at the work plane. Document everything — baseline data makes future troubleshooting possible.
Conclusion
Solar high bay light installation adds steps to the standard fixture-hanging process, but every step follows a logical sequence. Plan the DC wiring, battery placement, and array mounting before lifting the first fixture.
Use DC-rated breakers on every circuit. Verify polarity before energizing anything. Follow the commissioning sequence: battery first, array second, fixtures last.
Remote warehouses, distribution centers, and industrial facilities all share one constraint when going solar: no room for error on the first startup. A reversed polarity connection or an undertorqued battery terminal can turn a routine installation into a costly repair.
Get the array mounted solidly. Get the battery room ventilated and temperature-controlled. Get the controller configured for LiFePO4. Wire each DC circuit with proper gauge and verified polarity. And commission the system one circuit at a time with a light meter in your hand.