Factory lighting layout design starts with matching illuminance levels to tasks, selecting fixtures for your ceiling height, and spacing them at 1 to 1.5 times the mounting height for uniform coverage. A well-designed layout eliminates dark spots, minimizes energy waste, and keeps your facility compliant with OSHA and IES standards.
Tom is a plant engineer at a Texas manufacturing facility. In 2023, his 40,000-square-foot floor was lit by 80 metal halide high bays arranged in a perfect grid. The spacing was 20 feet on center, which looked tidy on paper. But the reality on the floor was different. The inspection stations near the south wall were dim because the fixtures there had been removed years ago and never replaced. The center of the floor was blindingly bright, wasting energy. And the new CNC machine cast a shadow over the adjacent workbench that made fine measurements impossible.
That is what happens when layout design is treated as an afterthought. This guide gives you the complete factory-focused methodology: how to determine the right light levels for each task, calculate fixture counts and spacing, handle real-world challenges like machinery shadows and crane bays, and verify your layout after installation.
For the broader strategic framework on factory lighting, see our complete guide to (factory lighting solutions).
Key Takeaways
- Factory lighting layout design requires matching IES illuminance targets to each task type, from 200 lux in storage to 1,000+ lux at inspection stations.
- Fixture spacing should be 1 to 1.5 times the mounting height; higher ceilings and narrower beam angles need tighter spacing.
- Uniformity ratio (minimum divided by average) should be at least 0.7; anything lower creates eye strain and safety hazards.
- Real factory challenges like crane bays, conveyor shadows, and racking aisles require layout adjustments that standard calculators miss.
- Always verify your layout with a post-installation lux grid measurement before signing off on the project.
Why Factory Lighting Layout Matters

The Cost of Poor Layout
A poorly designed layout is expensive in three ways. First, over-lighting wastes energy. Many factories install the same wattage everywhere to avoid complexity, which means storage areas get the same illuminance as assembly lines. According to the U.S. Department of Energy, over-lighting wastes 20 to 40 percent of lighting energy in typical industrial facilities.
Second, under-lighting reduces productivity and increases quality errors. Research published in the IES Lighting Handbook shows that proper lighting layout can improve productivity by 6 to 16 percent. Workers strain less, make fewer mistakes, and experience less fatigue.
Third, non-uniform lighting creates safety hazards. Dark spots near trip hazards, uneven transitions between bright and dim zones, and glare from poorly aimed fixtures all increase accident risk.
The Compliance and Business Case
OSHA does not specify exact lux levels for every task, but it does require adequate illumination for safe operations. Poor lighting is cited in accident investigations and can affect insurance premiums. Beyond compliance, a well-designed layout supports quality control, reduces rework, and creates a better work environment that helps with retention.
For the compliance baseline that underpins any layout project, see our guide to (OSHA factory lighting requirements).
How to Determine Light Level Requirements for Factory Tasks
IES Recommended Illuminance Levels
The Illuminating Engineering Society publishes recommended illuminance levels for industrial tasks. These are not arbitrary numbers. They are based on visual task difficulty, worker age, speed and accuracy requirements, and reflectance of the work surface.
| Factory Zone | Task Type | IES Recommendation | Notes |
|---|---|---|---|
| Storage and warehousing | Rough visual task | 150-200 lux | Pallet identification, general movement |
| Shipping and receiving | Medium visual task | 300-500 lux | Label reading, forklift operation |
| General assembly | Medium visual task | 500 lux | Component handling, standard assembly |
| Machine shop | Medium visual task | 500 lux | Tool operation, part inspection |
| Fine assembly | High visual task | 750-1,000 lux | Small components, detailed work |
| Quality inspection | Very high visual task | 1,000-2,000 lux | Defect detection, precision measurement |
| Color matching | Special visual task | 1,500+ lux | CRI 90+ required |
These values are maintained illuminance, meaning the minimum you should measure at any point in the zone after accounting for light loss over time.
For a deep dive on precision task lighting, see our (precision manufacturing lighting guide).
Color Temperature and CRI by Task
Quantity of light is only half the story. Quality matters too. For production areas, 4000K to 5000K is the standard. It is crisp and energizing without the harshness of higher color temperatures. For inspection and color-critical tasks, specify a color rendering index of 90 or higher. General factory work can use CRI 80 or above.
Lisa is a facilities manager at an Ohio warehouse. Her 30-foot racking aisles were lit by the same 200W UFO fixtures used in the open floor area. The horizontal illuminance at the floor was fine, but pickers struggled to read labels at the third shelf level. She re-did the layout with linear high bays aimed down the aisle centers. The vertical illuminance at the pick face jumped from 180 lux to 450 lux. Mis-picks dropped 22 percent in the first quarter.
Key Calculations for Factory Lighting Layout
The Spacing Criterion
The most common rule of thumb in industrial lighting is this: space fixtures at 1 to 1.5 times the mounting height. A fixture mounted at 25 feet should be 25 to 37.5 feet from its neighbor. Lower ceilings and wider beam angles favor the upper end of that range. Higher ceilings and narrower beam angles favor the lower end.
This rule works for open areas with uniform ceiling heights. It breaks down when you have obstructions, varying task levels, or non-rectangular floor plans.
Lumen Calculation Method
For a more precise approach, use the lumen method. The formula is:
Total lumens needed = (Area in square feet x Target lux x 0.0929) / (CU x LLF)
The 0.0929 converts lux to foot-candles. The coefficient of utilization, or CU, accounts for how much light reaches the work plane versus being absorbed by walls and ceilings. A typical factory with light-colored walls and a high ceiling might have a CU of 0.6 to 0.7. The light loss factor, or LLF, accounts for dirt accumulation and lumen depreciation over time. A conservative LLF for LED is 0.8.
Worked Example

Consider a 10,000-square-foot assembly area with a 25-foot ceiling and a target of 500 lux.
- Area: 10,000 sq ft
- Target: 500 lux
- CU: 0.65 (medium reflectance, open space)
- LLF: 0.8 (LED, moderate dirt conditions)
Total lumens needed = (10,000 x 500 x 0.0929) / (0.65 x 0.8) = 893,000 lumens.
If you select 150W LED high bays delivering 22,500 lumens each, you need 893,000 / 22,500 = 39.7 fixtures. Round up to 40 fixtures. Arranged in a grid, that is roughly 8 rows of 5 fixtures, spaced at about 22 feet by 25 feet.
Uniformity Ratio
Uniformity is what separates a good layout from a bad one. The minimum-to-average illuminance ratio should be at least 0.7. That means the darkest spot in the zone should be no less than 70 percent of the average. The maximum-to-minimum ratio should not exceed 3:1.
You measure this with a lux meter. After installation, create a grid of measurement points across the work plane, typically every 10 feet. Record the lux value at each point. Divide the minimum by the average for the uniformity ratio. If it is below 0.7, add fixtures or adjust spacing.
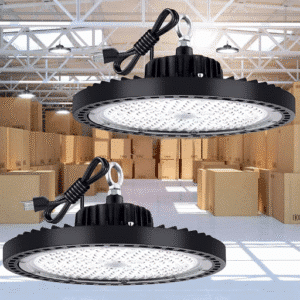
Fixture Spacing by Ceiling Height and Application
Spacing Guidelines
| Mounting Height | Spacing (Grid Pattern) | Typical Fixture | Best For |
|---|---|---|---|
| 15-20 ft | 12-15 ft | 100-150W UFO | Workshops, low-bay production |
| 20-30 ft | 15-20 ft | 150-200W UFO | Assembly, medium-bay factories |
| 30-40 ft | 20-25 ft | 200-250W UFO | Warehousing, high-bay logistics |
| 40+ ft | 25-30 ft | 250-300W UFO | Steel mills, very high-bay facilities |
These are starting points. Narrow beam angles tighten spacing. Wide beam angles loosen it. Staggered patterns improve uniformity compared to square grids.
Layout Patterns
Grid pattern is the simplest. Fixtures are arranged in rows and columns. It works well in open rectangular spaces. The downside is that the corners of the grid squares tend to be the dimmest spots.
Staggered pattern offsets every other row by half the spacing distance. This breaks up the grid symmetry and improves uniformity. It is the preferred pattern for most factory applications.
Aisle pattern aligns fixtures with the centerlines of racking or production aisles. Linear high bays work best here because their elongated beam shape matches the aisle geometry.
Tom eventually replaced his 80 metal halide fixtures with 56 LED high bays in a staggered pattern. The spacing was tighter where the ceiling was lower and wider where it was higher. He improved uniformity from 0.5 to 0.75 and reduced energy consumption by 62 percent, even though some zones now had better light than before.
Factory-Specific Layout Challenges

Crane Bays and Overhead Equipment
Overhead cranes, hoist equipment, and conveyor supports all block light. A fixture directly above a crane runway will have its output partially obstructed every time the crane moves into position. The solution is to mount fixtures offset from crane runways, not directly above them. Use vibration-resistant mounts in crane bays; crane movement creates continuous low-frequency vibration that can loosen standard hardware.
Conveyor and Production Line Lighting
Conveyors create two problems. First, the conveyor structure itself blocks light from overhead fixtures, creating shadows on the belt surface. Second, the belt movement creates a stroboscopic effect if the fixture has any flicker.
The solution is supplementary lighting. Mount linear fixtures parallel to the conveyor on the sides, not just overhead. This provides cross-lighting that eliminates shadows. At inspection stations, add dedicated task lights with high CRI for defect detection.
Aisle and Racking Layouts
Standard spacing calculations assume an open floor. Racking changes everything. The vertical surfaces of the racks need illumination for picking and putaway. Horizontal illuminance at the floor is irrelevant if workers cannot read labels at eye level.
For aisles narrower than 10 feet, linear high bays mounted above the aisle centerline provide better vertical illuminance than UFO fixtures. For wider aisles, a combination works: UFOs for the open areas and linear fixtures for the aisles. Aim for 300 to 400 lux on the vertical rack face at the average pick height.
Machinery Shadows
Large machinery like presses, injection molders, and CNC machines block overhead light and create shadow zones. Do not rely on general illumination to light inside machine envelopes. Add dedicated task lighting or low-bay fixtures adjacent to the machine. Be careful with glare: shiny metal surfaces reflect light directly into operators’ eyes if fixtures are poorly aimed.
For the fixture selection guidance that supports these layout decisions, see our guide to (high bay lighting for factory applications).
Lighting Design Software and Tools
DIALux evo
DIALux evo is free, professional-grade lighting design software used by lighting engineers worldwide. You build a 3D model of your facility, assign surface reflectances, place fixtures from manufacturer photometric files, and run calculations. The output includes illuminance contours, uniformity ratios, and 3D renderings.
The learning curve is moderate. For a simple rectangular factory, you can get useful results in a few hours. For complex geometries with mezzanines, racking, and equipment, expect to spend a day or more. For general manufacturing lighting guidance, see our guide to (best lighting for manufacturing plant environments).
AGi32
AGi32 is the industry standard for advanced lighting analysis. It handles complex geometries, daylight integration, and custom reflectance models with precision. The cost is premium, typically several thousand dollars for a license. It is worth the investment for lighting design firms and large facilities with complex requirements. For most factory projects, it is overkill.
Simple Spreadsheet Method
For 80 percent of factory projects, a spreadsheet is sufficient. List your zones, areas, target lux levels, and selected fixtures. Use the lumen method formula to calculate fixture counts. Sketch the layout on graph paper or a PDF floor plan. This approach takes two hours and catches most problems before procurement.
When to Hire a Lighting Designer
Consider a professional lighting designer when your facility has complex geometry, mixed task types with very different illuminance requirements, or compliance-critical applications like food processing or pharmaceutical manufacturing. A typical factory lighting design costs 2,000to2,000to5,000 and can save multiples of that in avoided rework and energy optimization.
Installation and Commissioning Verification

Pre-Installation Planning
Mark every fixture location on the floor plan before the installers arrive. Verify that the electrical panel has sufficient capacity. For LED retrofits, this is rarely a problem because LED fixtures draw less current than the HID fixtures they replace. But verify anyway. Plan the installation sequence by zone so production can continue in adjacent areas.
Post-Installation Lux Verification
After installation, verify the layout before signing off. Create a measurement grid with points every 10 feet across the work plane. Measure and record lux at each point. Calculate the average, minimum, and maximum. Compute the uniformity ratio. Compare against your design targets.
If the uniformity ratio is below 0.7, identify the dark spots and determine whether adding a fixture, relocating an existing one, or adjusting an aim angle will fix it. Document the as-built layout and the measurement results. This documentation supports warranty claims, rebate applications, and future maintenance.
Adjustments and Optimization
Fine-tuning after installation is normal. A fixture might need to shift 3 feet to eliminate a shadow. A dimmable system might need its maximum output adjusted to match the target without exceeding it. In smart lighting systems, you can tune zones individually from a dashboard. For guidance on adding smart controls to your layout, see our guide to (smart factory lighting.)
Chen is a project manager at a food processing plant in California. His layout had to satisfy two inspectors: the health department and the fire marshal. The health department wanted 500 lux at every work surface. The fire marshal required emergency egress lighting along every exit path. Chen used IP65 fixtures with integrated emergency battery packs for the general lighting, which satisfied both requirements in a single mounting. The layout was verified with a 10-foot lux grid, and both inspectors signed off on the first visit.
Frequently Asked Questions
How many high bay lights do I need for my factory?
Divide the total lumens required by the lumen output per fixture. Total lumens = (Area x Target lux x 0.0929) / (CU x LLF). A 10,000 sq ft assembly area at 500 lux needs about 40 fixtures delivering 22,500 lumens each. Adjust for your specific ceiling height, reflectances, and task types.
How far apart should factory lights be?
Space fixtures at 1 to 1.5 times the mounting height. At 25 feet, that is 25 to 37.5 feet on center. Use tighter spacing for narrow beam angles, higher ceilings, and tasks requiring high uniformity. Use wider spacing for low ceilings, wide beams, and general storage.
What is the minimum lux level for factory work?
It depends on the task. IES recommends 150 to 200 lux for rough work like storage, 500 lux for general assembly, and 1,000 to 2,000 lux for fine inspection. OSHA requires adequate lighting for safe operations but does not specify exact lux values for every task.
Can I use the same layout for LED as I did for metal halide?
Not without review. LED fixtures are more directional than metal halide, which means spacing that worked for omnidirectional HID might create dark spots with LED. LED also delivers more lumens per watt, so you may need fewer fixtures. Always recalculate the layout when switching technologies.
How do I light around large machinery?
Do not rely solely on overhead fixtures. Large equipment blocks light and creates shadows. Add supplementary low-bay or task lights adjacent to the machine. Cross-light from two directions to eliminate single-source shadows. Be mindful of glare from shiny surfaces.
Conclusion
Factory lighting layout design is not about drawing a grid on a floor plan and calling it done. It is about understanding what each zone needs, calculating the right number of fixtures, spacing them for uniformity, and solving the real-world problems that standard calculators ignore.
The methodology is straightforward. Determine your task-specific illuminance targets from IES standards. Calculate total lumens using the lumen method. Space fixtures at 1 to 1.5 times mounting height, using a staggered pattern for better uniformity. Address factory-specific challenges like crane bays, conveyor shadows, and racking aisles with targeted adjustments. And always verify with a post-installation lux grid.
A good layout pays for itself. It cuts energy by eliminating over-lighting. It improves productivity by giving workers the light they need. It reduces liability by eliminating dark spots near hazards. And it lasts the life of the installation because it was designed right the first time.
For the complete strategic framework on factory lighting, from fixture selection to retrofit planning, see our (factory lighting solutions guide).
Ready to design your factory lighting layout? Probapro engineers can model your facility, calculate optimal spacing, and deliver a documented layout plan with fixture specifications and lux targets. Request your free layout design assessment.
This guide provides general information on factory lighting layout design. Always consult a qualified lighting designer and your local Authority Having Jurisdiction for project-specific requirements and compliance verification.