LED high bay lights must be correctly installed for an ideal performance and long-lasting durability in the harshest industrial and commercial environments. The guide is intended for professionals looking for a step-by-step, intricate explanation of installation in order to be safe and efficient. The information contained herein is intended for one looking to effectively undertake an installation project, either to enhance already existing lighting systems or for the construction of a new project, and so much more. Starting with pre-installation basic preparations, down to box wiring and final safety procedures, we shall provide you with the relevant details of every step while pointing out the best practices and industry standards. Once we are through, you will have learned so much to attain the best results and keep the desired reliable performance that LED high bay lights assure.
Understanding High Bay Lighting

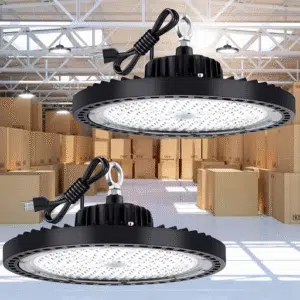
High bay lights provide illumination specifically for spaces with high ceilings, generally about 20-40′ above the floor. These types of fixtures are commonly found in industrial facilities, commercial facilities, and large-scale ones such as warehouses, factories, and gymnasiums. Primarily, intense point lighting is to be diverted to provide enlightened uniformity at a broader intensity over a larger area without leaving pockets of shadows to offer comfort to the person. High bay lighting is typically engineered to provide intense light at the optimum level while ensuring advantages in power efficiency and robustness; these qualities encourage versatile applications in areas not only rigidly defined by levels of ruggedness.
What is High Bay Lighting?
When discussing high bay lighting, the conversation has to touch on the fact that high bay lighting is a lighting system made for ceilings with a great height, most commonly being 20 feet or more between the floor and the bottom of the light. High bays are made to give out high lumen output in large spaces, providing continuous working brightness, and hence prove fundamental for working environments such as warehouses, manufacturing, gymnasiums, or other buildings classified as industrial, retail, or business. But basically, more lumen efficiency and energy savings that are mainly catered through High bay lighting are to curtail glare and provide consistent lighting, making safety, productivity, and operational efficiency easily within reach through challenging high-activity spaces.
Applications in Industrial and Commercial Spaces
High bay lighting is vital in places with ceilings typically between 20 feet and 45 feet, in order to provide the best lighting to large open spaces and areas. These are indeed greatly useful for warehouses for a clear sight of inventory and safe handling of forklifts. In production environments, high bay lighting also plays an instrumental role in occupational safety by providing the precision lighting required for the overall enhancement of safety in harsh environments. Gymnasiums have benefitted immensely due to their capability to throw even light over large portions and, in doing so, enhance performance and visibility during sporting activities or events. Still, high bay lights gain utilization in large department store spaces, airplane hangars, and conference rooms for their true customer- and operation-focused values. Having such versatility in regulating the light requirements for such vast, contrasting aspects of light, high bay lights up as a fundamental piece in the various kinds of high-height structures.
Benefits of LED High Bay Lights
LED high bay lights are energy-efficient compared to traditional lighting solutions, with lower power consumption and similar to, or better, lumen outputs. The associated operating costs are subsequently relatively much lower, with the end user realizing significant savings, a marker of high EROI. Focused upon lifespan, illumination can be developed for extended periods, extending up to 50,000 hours. As long as they are reapplied when necessary (low maintenance), the shortcomings can be forgiven. This is especially beneficial in high-cribbed lighting situations where maintenance activities are long and overly expensive.
Among other advantages, the industry-standard approach in daily work safety and illumination is consistent light intensity with superior color-rendering, thereby increasing the visibility and safety of trade and industry structures and alike. High bay lights can start up the usage like a flash without any flicker, ensuring the height of operationality for every continuous application. Many models are very green, in that many of them feature no harmful materials such as mercury and operate at temperatures that give off far less heat, which also lessens the cooling costs associated with insulated spaces. So dynamic, cozy, and highly capable are the touches added to the trustworthy, modern, light model that is high bay LED.
Preparing for Installation

- Analyze Your Proposed Installation Area: Check if this area is fit for high bay light housing, considering the required light levels, ceiling height, space, etc.
- Equip Yourself and Have Your Essential Materials and Tools at Hand: Make sure that you have all the equipment ready and in first-class shape. Take your time to refer to the manual’s guide before working on the other terms.
- Switch Off the Power: To guard against major personal injuries, emotional affliction, and property damage, the power should be switched off to the related farm.
- A Quick Look Over the Fixtures: Assessed for any irregularities and damage to the LED high bay lights.
- Refining Layouts: Your new lighting system should conform to your lighting design, following all lighting standards and giving proper coverage in every possible spot.
Tools and Materials Needed
LED high bay lights will usually require the following tools and materials to be successfully installed:
| Category | Item | Purpose |
|---|---|---|
| Safety Equipment | Gloves, safety glasses, and a hard hat | To ensure safety during the installation process |
| Access Equipment | Ladder or Lifter | To safely achieve the mounting height of the high bay lights |
| Mounting Hardware | Brackets, hooks, or mounting accessories | To secure the fixtures as suggested by the manufacturer |
| Power Tools | Power Drill and Screw Driver | To secure the mounting hardware and for minor adjustments |
| Electrical Tools | Wire Strippers and Cutters | Used for stripping the electrical wiring and connections |
| Testing Equipment | Voltage Tester | To ascertain the destructive power to allow safe electrical connections |
| Connection Materials | Wire Nuts and Connectors | To quickly and safely secure wires |
| Measuring Tools | Tape Measure | To position the lights accurately for uniform light coverage as per a lighting plan |
| Documentation | Installation Handbook | Providing guidance on installations to fit or superior to specifications |
| Electrical Components | Electrical Wires or Cables (as required) | To fit the needs of the power supply and the fixture |
Note: Availability of all these tools and materials eventually ensured a smooth, safe, and efficient installation procedure; cross-checking specifications with the manufacturer is profoundly important.
Assessing the Installation Area
A thorough assessment of the installation area is imperative to guarantee safety, operability, and fulfillment of design criteria. Try to measure and validate the space dimensions to be appropriate for the lighting plan, and if possible, order the fixture to be matched to fixture specifications found online. Observe the mounting surface for solidity so it sustains the weight of the fixture and withstands vibrations. Make sure the planned site can have an electricity run safely with connections according to local codes. Moisture, heat, condensation, and any other factor should be taken into account when choosing an outdoor-rated fixture. An exhaustive review of all of this allows one to negate possible risks, making certain that the system performs best.
Selecting the Right LED High Bay Fixture
Choosing the proper LED high bay fixture considers several key aspects for efficiency, compliance, and application suitability.
Lumen Output and Wattage
Decide on the necessary lumens output with regard to the height at which the fixture will be installed and the area to be lighted. The higher lumen fixtures are good for lighting large spaces with high ceilings (15-50 feet). The selection of fixtures with a befitting wattage ensures energy conservation without losing brightness.
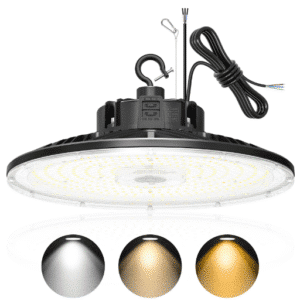
People can start selecting color temperatures that will align with the environment and the particular task at hand. Choices can typically range in the middle of about 4000K (neutral white) to 5000K (daylight), and this is the range conducive to increasing efficiency and ensuring visibility. If environments need accurate color representation, that is possible through a high CRI, typically 80 and above.
Energy Efficiency and DLC Certification
Looking for energy-efficient luminaries with high lumens-per-watt (LPW) ratios with DLC standard or premium certification will guarantee access to rebate programs, which can be a sign of good performance quality.
Durability and Environmental Suitability
When thinking about fixture installations, one should choose fixtures having the required environmental ratings, such as IP65 or higher, for wet or dusty settings. Material quality plays a role in the scenario; for instance, aluminum housing helps with heat dissipation and thereby the resistance to corrosion to give longevity in the industrial or retail environment.
Dimming and Smart Controls
To maximize adjustments and leave the possibility of an enhanced-energy management power, maybe this control messes with that; choose fixtures with dimming capabilities or smart control system capabilities that have higher utility for saving energy.
Granted, here, a blend of these points would help you pin down the best LED high bay fitting based on your specific illumination needs, pushing the system to maximum performance.
Step-by-Step Installation Process

Read the specifications first. Read them again! These specifications are really important. The manual will explain any extra requirements that your LED high bay will need. Make sure your power supply and mounting type are compatible.
Power Off
Turn your power off at the source, switching it from the circuit breaker. This is to avoid coming into contact with the power when working in an electrically heated environment.
The Suitable Mounting Location to Choose
After identifying the location for your fixture, ensure hardware mounting, including chain, hook, or bracket, is installed private. This should depend on the design of the fixture.
Fixture Attachment
Attach the high bay fixture of the LED safely to the mounting hardware. Do not forget to check that it is firmly attached and does not move.
Wire It Up
Wire up the connections for the fixture with wires from the power supply, appropriate to these uses. Insulation of the connectors is a must.
Inspection and Testing
Ensure that the installation is stable by retesting. Resupply the power and test that the fixture functions correctly.
Step 5: Adjust Settings
Power-cycle the unit manually and make certain all settings are ordered correctly inside the digital approach, and it still sits with an array of smooth settings.
By following the outlined procedure, you will have a safe and efficient installation of your LED high bay lighting system.
Install High Bay Lights: Initial Setup
For a successful start of a high bay lighting system, here is a tip guide.
Determine an Appropriate Mounting Height and Spacing
The tough job at this stage is to determine the mounting height together with the individual bays’ spacing. Very-high spaces are considered to be those exceeding 20 feet, and many times we can get a decent spacing out of lumen output options to afford us an ideal spacing for uniform lighting. Refer to the manufacturer’s specifications for appropriate configurations.
Choose a Mounting Method
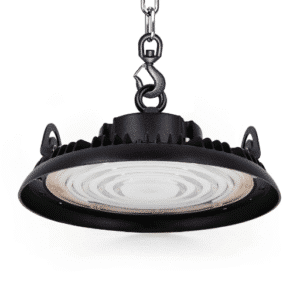
Select mounting hardware to suit the fixture and ceiling type. Choose from hook mounts, pendants, or surface grounds. Be sure to use hardware with appropriate weight ratings for the fixtures, which conform to safety codes.
Work on Electrical Connections
In light of the aforementioned technical factors about the installation of packed LED lamps, it is important to check the voltage requirements of the lamps and match this information against the power available for said installation. Have the wiring verified in order to ascertain its compliance with local electrical codes. For reasons of safety and reliability, use proper connectors, junction boxes, and protections for the wiring.
The advantage that comes with the placement of these things during the initial stages of setup is not easy to ignore. When you think of this, you naturally become privy to the efficiency and ultimate safety of any high bay light system.
Wiring the LED High Bay Lights
To effectively wire LED high bay lights, follow each of these detailed steps to guarantee that optimal functioning and safety standards are met:
- Power Off: Firstly, shut off the power supply to the lighting circuit on which the high bay lights are intended to be installed. Test the circuit using a voltage tester to ensure it’s not live.
- Examine Wiring and Connectors: Check whether the electrical wiring can be pinned to the LED lighting of the high bay. Make sure the connectors are above the load, and the insulation prevents the failures or short-circuits from igniting sometimes.
- Ground the Wires: Connect the ground wire from your LED high bay lighting fixture to the grounding wire of your building. If the junction box or luminary has a ground terminal, connect it instead. It provides a necessary safety feature.
- Connect Live and Neutral Wires: Connect the hot (live) and neutral wires of the supply to the matching wires of the LED fixture using wire nuts or crimp connectors to ensure they remain tight.
Connecting the Power Source
Begin by turning off the main power to prevent any sudden accidents caused by electricity when you are connecting power. To distinguish the live, neutral, and ground wires from both the fixture and the power source, it is recommended to know the colors of wires for various purposes. Normally, the live wire is black, the neutral wire is white, and the ground wire is green or untreated. Join corresponding wires from the source to the light using wire nuts or connectors: live to live, neutral to neutral, and ground to ground. Make sure the connections are secure using nuts or connectors so no wire is exposed or shaking loose. Press the wires back into the junction box and try not to pull on connections or bend them severely. Turn on the power and start the test, just to make sure that it functions correctly with no flickering or abnormalities. Always ensure compliance with the local electrical codes and the manufacturer’s instructions for the best outcome and the safest practicality.
Post-Installation Considerations

After installation, it is crucial that an LED fixture is frequently inspected for any evidence of wear, damaged components, or improper functioning. Check for the uniformity of light output, secure mounting, and correct operation of any associated controls or dimming devices. In the event of flickering or performance interruptions, review the electrical connections that relate to it, ensure that they are tight, and conform to the specifications. In the manufacturer’s troubleshooting guide, certain issues are highlighted, and suggested solutions are provided. Best practices for routine maintenance should be applied to help extend useful life and efficiency, like cleaning the fixture and checking for proper ventilation. Power must be switched off before making adjustments or any sort of maintenance activity.
Testing and Troubleshooting
In order to extensively test your electrical or lighting systems, the first thing you need to do is check the power supply. If it is a multimeter, check that the level of voltage is within the manufacturer-specified range for the device. You may need to look out for disconnected wires, mangled connections, or faulty components impairing functionality. If the problem does not disappear, try to isolate each component to see if it is the one causing the problem. If you have flickering lights on dimmers, check to see if the light bulbs are compatible with your dimmer system; incompatibility with dimmer systems is a common issue. Also, make sure that everything is properly grounded and that no circuit overloading has occurred. Lastly, have proper ventilation for heat dissipation; the light fixture may turn off as overheating may cause it to not function periodically.
In case the problems persist without remedy, just refer to the manufacturer’s troubleshooting guide or online technical support; go step by step to diagnose the cause and be familiar with information on common issues that may arise. Please keep safety foremost when testing a particular objective, and before examining or working on other components, remember to disconnect the power.
Adjusting for Optimal Illumination
Getting even and adequate lighting entails three significant aspects–the intensity, placement, and color temperature of the light. The first step in the process is to choose the light source that best suits the aim of the desired application, and make sure it produces enough lumens to be adequate in terms of the size and use of the space. When deciding the positioning for lighting, the low level of glare and shadows could and should be attained by angling the fixtures for the better dispersion of light. For tasks where extreme precision is of utmost importance, consider the use of powered adjustable fixtures to permit maximum optimization of placement.
Additional consideration toward light solution focuses on color temperature, which is actually measured in Kelvins (K). Warmer temperatures (2700K-3000K) should be considered for zones where relaxation is favored, while colder temperatures (4000K-5000K) can be embraced in designing workspaces to increase attention on the work being done and uphold visibility. Luminous depreciation should be kept at an additional distance-ensure frequent cleaning and maintenance of the sources of light and light fittings. Loftiness, which can guide light intensity properly to not overpower the area, is another, more visionary area; intelligent lighting lamp posts equipped with the latest AV for the proper use under which you are aware, shall achieve this loftiness and actually correctly illuminate what you need to light.
Dimmer Installation for High Bay Fixtures
To install dimmers in high bay luminaires, a few important steps need to be taken to secure good operation and compatibility. Initially, verify if your high bay luminaires are dimmable. Not all high bay luminaires support this function; just positioning an LED within the luminaire could lead to verifying its dimming capability, with common standards including 0-10V and DALI. Secondly, choose a compatible dimmer switch or control system compatible with the features of your particular luminaire and preferred control function, whether it includes manual operation and automation.
First, turn off the power before proceeding with the installation for safety. Use whatever wiring diagram is supplied by the fixtures manufacturer or dimmer switch manufacturer. For 0-10V systems, connect the dimming wires- usually purple and gray- from the fixture to the corresponding control wires of the dimmer. It is necessary to insert appropriate and correct connectors and provide good insulation for the connections. Before connecting the dimmer, test that everything works correctly by dimming the light intensity: make sure that dimming works well.
Smart dimming setups are best suited for automation and monitoring. Even when a dimming system functions properly without any substantial modifications, it is essential to provide a comfortable ambient lighting level, allowing visual inspection for lighting maintenance exercises. No piece of specialized equipment can change that fact.
Maintenance and Safety Tips

Check Regularly
Inspect lighting fixtures at regular intervals to detect wear, damage, or dangling connections. Fix the problems instantly to avoid a blackout.
Clean Components with Care
Use a soft cloth or prescribed cleaning solutions to gently clean the dust and debris off of fixtures and lenses. No abrasives that can scratch surfaces, please!
Check Intended Lamps
Ensure the bulbs match in specs of the system’s requirements, especially with respect to the wattage and type, so overheating or inefficiency is successfully avoided.
Work Closely with Safety Concerns
Doing any kind of maintenance work, turn off the power at the circuit breaker, and be familiar with the local electrical codes. Call in a qualified professional if necessary.
Inducing the Proper Replacement
Wherever necessary, deliberate with equipment provider-approved screws, sockets, or wires so as to maintain the integrity and safety of the system.
If you can uphold best practices to their fullest extent, you will gain a long-lasting system running with dependability.
Regular Maintenance for Longevity
Follow standard maintenance schedules for extended life and superior performance. Consider starting by cleaning any parts that accumulate dust, debris, and contaminants, as this can impact functioning and could lead to overheating and short circuits later on. Check the connectors and wires for wear, corrosion, or poor connections; fix them if needed to prevent future glitches. Some key components, such as breakers, switches, and sensors, must be tested to determine normal working operation. Lastly, try to select a time for professional periodic inspection: a certified technician will find and clear potential problems, which may not appear in routine monitoring. Taking responsibility during such maintenance also reduces the number of potential surprises in the form of breakdowns and raises the efficiency of the whole system.
Safety Precautions During Installation
Whenever I am installing, safety guidelines are properly complied with to avoid possible accidents and ruin to equipment. Before any drilling or cutting is done, all power sources must be switched off, with the aid of the right testing devices. Insulated hand gloves, isolated eye protection, and other personal protective equipment are worn while installing to reduce potential injuries. Moreover, I establish a clear and tidy workspace to prevent tripping hazards. I never used any tools not rated for the job. In addition, I read any and all manufacturer guidelines in addition to all applicable codes and standards, thus ensuring a safe and efficient installation.
Common Issues and Solutions
| Issue | Solution |
|---|---|
| Power Supply Problems | Ensure the voltage and current data being supplied to the respective equipment conform to the machine manufacturer’s exact requirements. Inspect all cables for any breaks or damage while performing a continuity test, and replace cables accordingly or reset the source. Test the reliability of the power supply by using a voltage meter. |
| Faulty Components | Identify the malfunctioning components while isolating them and doing individual tests following the use of appropriate tools like an ohmmeter or continuity tester.Test each device precisely based on the manufacturer’s instructions, use a good method of testing for isolation along with voltage for resistance and continuity each time: a blown fuse is replaced only with a fuse of its rating; an arcing relay installed, rather than receiving the arcing surge, remains energized to throw it out in case of arcing conditions. Replace damaged parts using the procedures given by the manufacturer and ensure that they are suitable for the equipment and that their ratings are correct. |
| Noncompliance with Safety Standards | Check all installation steps against local electrical codes and guidelines, referencing the National Electrical Code (NEC) and any local standards that may apply. Verify installed equipment has been inspected for original compliance before activation. |
| Environmental Factors Affecting Equipment | Ensure the equipment is located in an area free from damaging moisture, excessive heat, or vibrations; enclosures may be required to address protection needs, as well as some other means of attending to such incidental occurrences. |
Reference Sources
“Soil Improvement Using Vibro-Replacement.”
“Moving Targets and Moving Markets in Commercial Lighting.”
“Substantial Research Secures the Blue Future for our Blue Planet.”
Frequently Asked Questions (FAQs)
How are high bay LED lights different from other LED lighting fixtures?
High bay LED lights are used in commercial buildings having high ceilings, such as 15 feet or more. They are ideal for casting efficient and precise light performance. Unlike standard LED lights or street lighting, high bay fixtures, for instance, UFO high bay or LED linear high bay, contribute to a specifically defined lighting performance that mitigates glare and enhances uniformity on the floor. When choosing between linear high bay and UFO high bay, it all comes down to whether they fit the lighting needs, layout, and the desired light distribution by the light.
How right do you think the stepwise guide is for the safe installation of high bay LED lights?
First thing that needs to be mastered during a beautified high bay installation site workflow in terms of your lighting needs and layout, as done first. Before starting your task at hand, follow the necessary procedures while keeping a check on your safety and protecting yourself. Turn the power off, secure support on all fixtures to hold their weight, connect each luminaire type to the ceiling or suspension the fixture at the spot according to the installation method, wire one fixture to the opposite termination (black to live, white to neutral, green or bare copper to ground), secure all wire connections and strain reliefs, aim the lights and then balance, and subsequently ensure compliance with all safety and code regulations. Look for experts in this field who can render their expertise in fixing high bay systems to help uphold integrity and safety.
Where should I start the connections when it comes to installing linear high/LED linear high bay fixtures?
Once you have installed a UFO High Bay Light, the guidelines must be followed for electrical conducting. In current models, three connectors are usually formed upon entry acceptance in the wiring compartment of the UFO High Bay Light. A big one metal color has live power; the second largest one belongs to neutral white, while the ground wire runs green/copper. The circuit or signal colors are purple or gray; these sometimes relate to some fixtures. This is where the dimming function controls are connected.
What common installation needs and wiring connections for UFO high bay lights do you think of?
These needs include a suitable mount with sufficient support for the weight, suspension hardware, or power outlet close to the ceiling structure. Also, connection wiring usually involves linking black wire (hot), white wire (neutral), or green or copper ground. However, in certain circumstances, dimming or control leads with a gray wire or additional lead must be used and connected following the wiring diagram to complete the job of affixing UFO high bay lights.
How will I secure optimal lighting with an industrial lighting project?
When speaking of High bay lighting, the second most pious of lighting from an industrial perspective, other than the placement of the lights, things include spacing, mounting height, beam angle, lumens per light or just the lumen output of fixtures with longer reflection, Thus, a faceted arrangement of fixtures whose light is refracted in all directions from the center for broad light installable using reflectors requires so much lumen coil output. Any additional costs to ensure mounting or proper housing may be worth it for a professional installation. Don’t save: wire, wire connector, and lamp should be competently installed to enhance lighting effects reaching maximum length. For outdoor settings, perhaps regular maintenance will be ideal based on the utilization of LED flood or LED flood fixtures. Expert opinion can also help balance energy savings with output.
What are the safety measures one should follow to install high bay LED lights?
The safety of the equipment and compliance with local codes are important. Before beginning the installation, ensure that permits and codes are cleared. Switch off the main power, use personal protective equipment, and check that the fixture is attached to the ceiling or suspension hardware with a loading tolerance strictly adhered to. Follow the manufacturer’s instructions on the installation so that this is all done correctly, like making the correct wiring connections-make sure the black wire is connected to live, the white wire to neutral, and the copper wire to ground. If confused about anything, employ a professional to ensure the safety and efficiency of installing that lamp.
Can I dim high bay LED lights, and what should I know about dim controls?
The majority of high bay LED lights support dimming capabilities. However, for this feature to be made effective in getting the best results, customers should have a leading dim wire, grey wire, or digital control interface—a feature that allows for dimming the lights in different ways with adequate wiring connections and lighting fixture guidance. An opportunity is available to increase the energy-saving and service life of the control gear in an existing product that may nevertheless satisfy its producers. Therefore, based on manufacturers’ semaphores or equipment-lab analysis, providing a possibly adventurous solution addressing flickering (or lack of it) of the lighting while dim controls capped on 0-10V, DALI, and TRIAC would be considered. All of these having better scopes mostly demand professional installers to judge their complications for network linking and commissioning of control and data cables.
When is it good to work with professional assistance to install high bay LED lights?
If you’re not confident installing… stuff that’ve involved complex wiring, heights where it’s riskier than safe—ranging probably above two- or four-legged ladders, with meanness and protection devices integrated into dimming, or long-term safety and conformance measures in complying with local electrical systems—ask a professional. A lineman must hook all these wires together in the correct fashion-to wit, connecting the grounding line, neutral, or return, and positive leads-while ensuring proper installation, mounting, weight-bearing capacity, and conditions that guarantee maximum luminescence. Professionals will also teach you the best choice to make on the UFO high bay, LED linear high bay, or LED floodlighting sources, and how much lumen output per light is required for any well-flooded place.